How to install NinjaOutreach Chrome extension and what you can do with it:
In this tutorial, we’ll show you exactly how to install our NinjaOutreach Chrome Extension and all the cool things you can do/achieve with it!
Namely, you’ll have access to dozens of SEO metrics about any page and if you’re a NinjaOutreach user, you can easily use it to add leads to your lists with a click!
Naturally, NinjaOureach’s Chrome Extension must be used with the Chrome Browser but it can run on any OS (Windows, Mac, etc)
Step 1: Install Chrome Extension
Go to Menu and click Download Chrome Extension
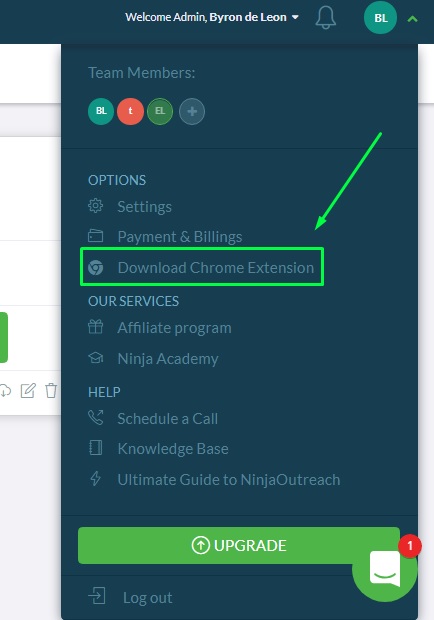
Then, you’ll be quickly redirected to the installation page. Just click “Add to Chrome” to install.

Once you’ve successfully installed the NinjaOutreach Chrome Extension, you should see the NinjaOutreach logo icon in the top right of your browser.
![]()
Step 2: Activate your Chrome Extension
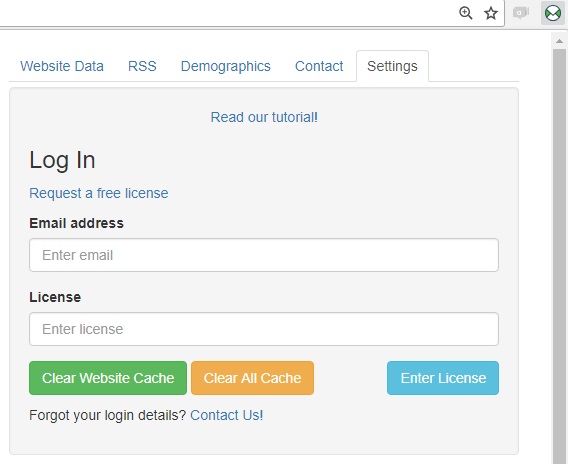
Now that you’ve installed it, click the icon and you’ll be asked to fill in your email address and a license key.
NOTE: If you change your email account in the NinjaOutreach app, you will need to update it on your Chrome Extension as well.
How to retrieve license key?
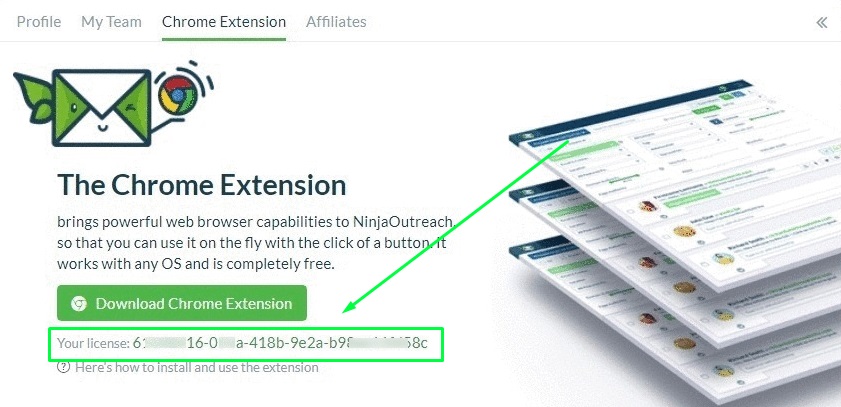
Go to Menu and click Settings.
In Settings, click the “Chrome Extension” tab and you’ll see your 32-character license key at the bottom.
How To Use The Chrome Extension
Here are the cool stuff you can do with the Chrome Extension:
- Review blogger information, leave notes, and assign relationship statuses.
- Add bloggers to your lists in NinjaOutreach – one-by-one and in bulk.
- Automatically fill contact forms for your outreach.
- Review your NinjaOutreach lists more efficiently.
View Blogger Information with NinjaOutreach Chrome Extension

The Chrome extension actually includes more data than the core software currently does, including (when available):
- Full Name
- Location/Address
- Links To Social Pages (Facebook, Twitter, Instagram, LinkedIn, Pinterest, G+, Youtube)
- Follower Counts for all social pages
- Domain Name
- Page URL
- Page Title
- Links To Key Pages
- About
- Contact
- Resources
- Infographics
- Podcasts
- Interviews
- Giveaways
- Sponsored Posts
- Product Reviews
- Guest Posts
- Press
- Monetization Techniques (banner ads, email lists)
- Meta Description
- Email Addresses
- Phone Number
- Alexa Rank
- Backlinks
- Page Authority
- Domain Authority
- Page Rank
- Moz Rank
- Klout Score
- Social Shares of page
See something that’s missing? Let us know!
RSS Feed – Filter By Author
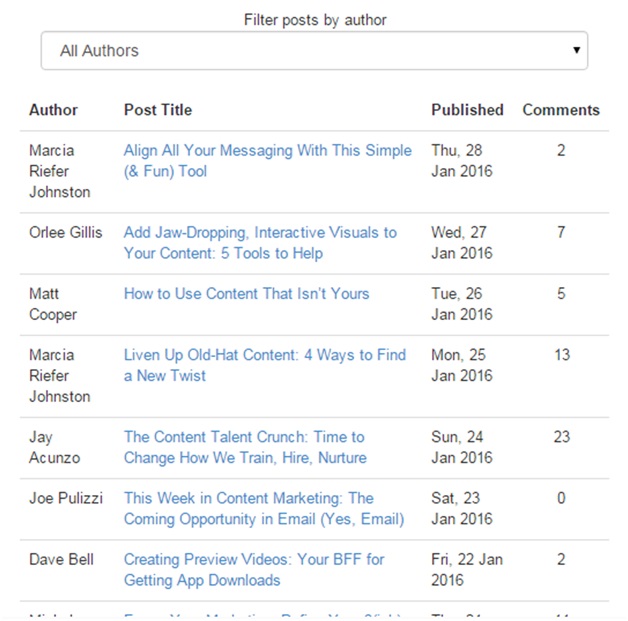
In the RSS tab (second from the left) you can see an RSS feed of the blog, including:
- Author name
- Hyperlinked post title
- Publish date
- Number of comments
And filter which author’s posts you want to see:
Twitter RSS
We also have a Twitter RSS showing latest tweets .

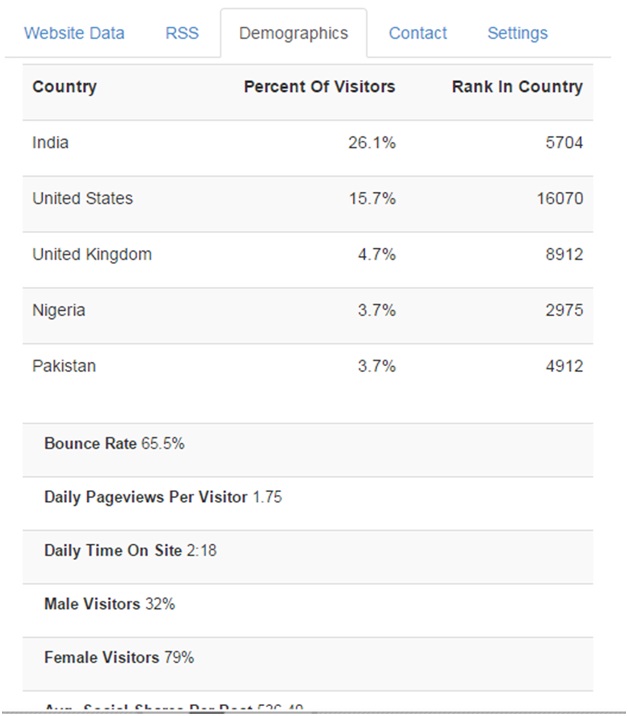
Demographic And Analytics Information
View the demographic data of the website straight from Alexa (without having to go to their website).
- Top countries by visitation
- Bounce Rate
- Daily Pageviews Per Visitor
- Daily Time On Site
- Percent Male Visitors
- Percent Female Visitors
- Average Visits Per Month
- Average Comments Per Post
- Average Social Shares Per Post
Add Notes To Bloggers
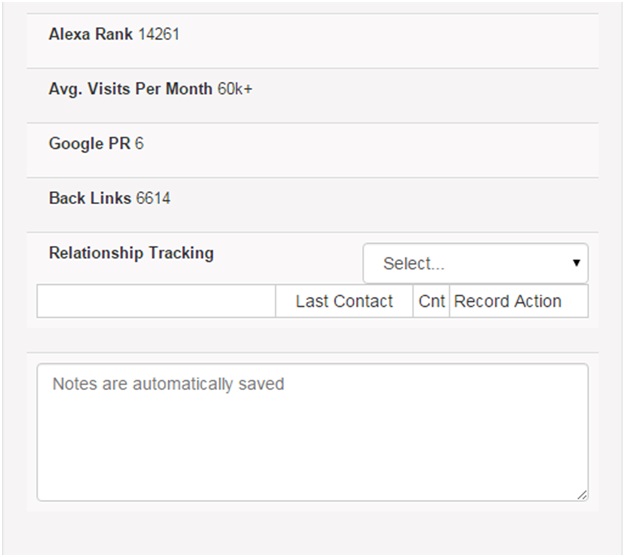
While on “Website Data” tab you will see a Note Taking Field at the bottom. After adding any note, If you save that lead to a list, the note will also be added to that lead.
Add Websites To Your Lists
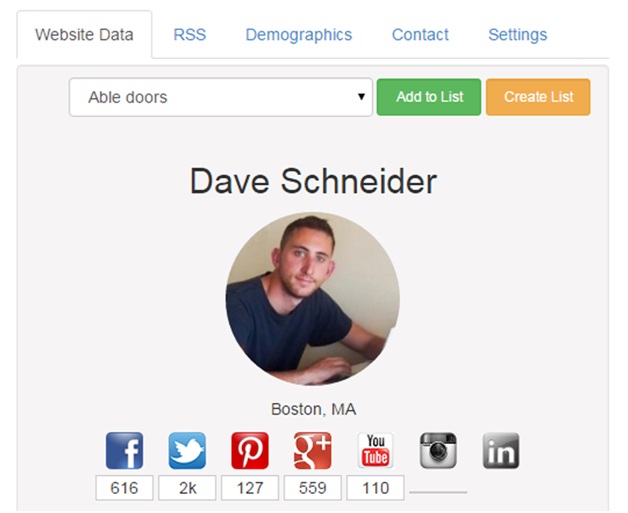
When you open the Chrome Extension, after the lead loads, you will have the opportunity to add the website to any of your lists (or to create a new one on the spot).
It will add any leads so long as it isn’t a duplicate. This includes any notes you take while on the Chrome Extension too.
Auto-fill Contact Forms with NinjaOutreach Chrome Extension:
Step 1: Create a Custom Template on WebApp
Step 2: Go to Contact Page
Go to the contact page of any website you want to contact.
You can also find contact page of the website by visiting the site and hitting the NinjaOutreach Chrome plugin icon and look for “Key pages” under “Website Data” tab.
Step 3: Fill Your Contact Form
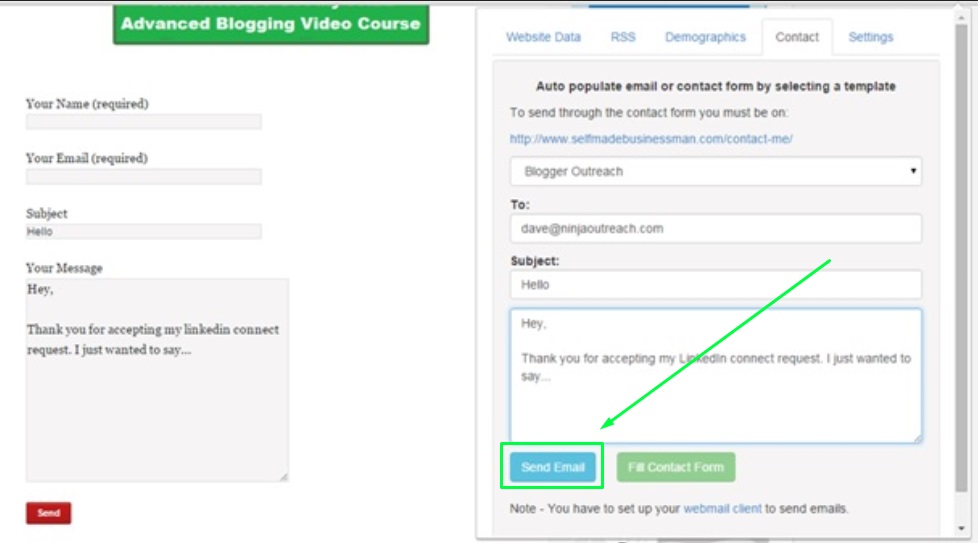
The Chrome Extension automatically syncs to pull your saved templates.
Select the template you want to use from the dropdown menu.
Click “Fill Contact Form” button.
You will see that the fields in the contact form are populated with the info and text of the template.
Step 4: Send!
Now click on the Send button on the website itself to send your message.
Note: NinjaOutreach has an email limit of 200 emails per day. Which means, if you have 1000 leads, your campaign will complete in the span of 5 days.
Review your lists
Sometimes you’ll have hundreds or thousands of leads in a list and you want to review them efficiently. Our Chrome Extension provides a pretty neat way to review each of these sites.
1. Select Your Leads
Choose the list you want to review. Then, select your leads via the checkboxes. Then, click the “Export” button to review it on the Chrome Extension.

2. Start Reviewing (Open Extension)
Once exported, a tab with the first site to review should open. Then, click the NinjaOutreach Chrome Extension icon to start reviewing.
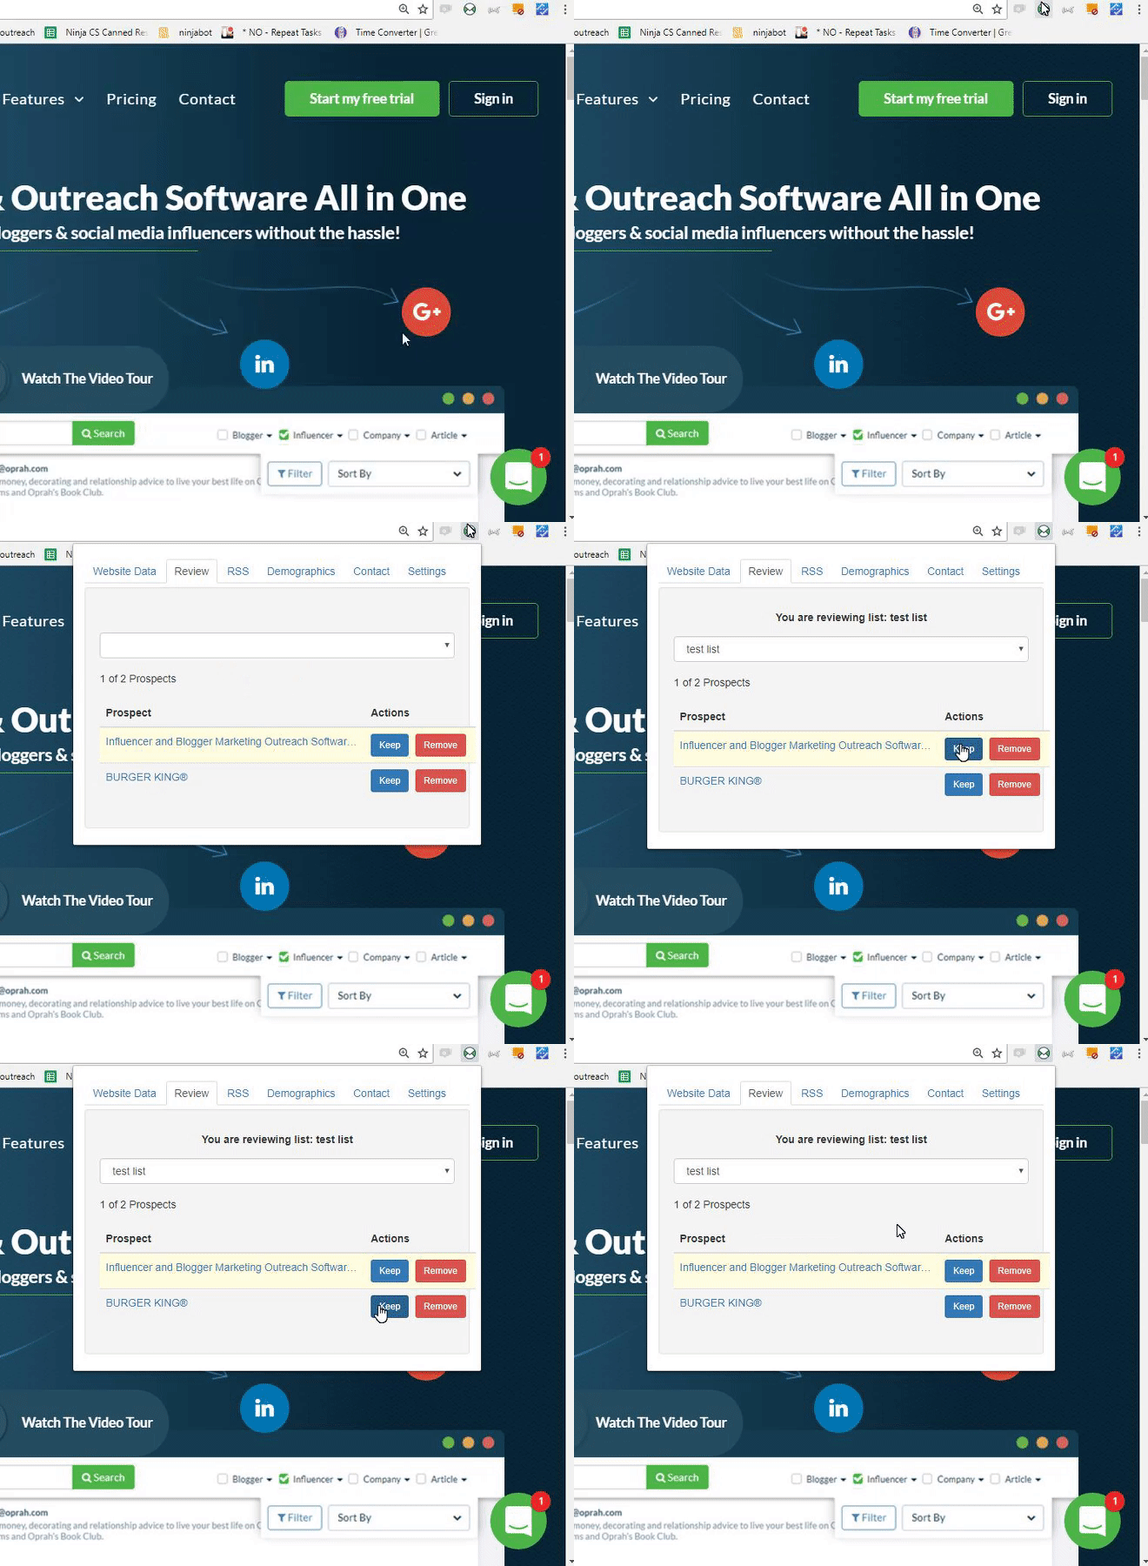
3. Add notes and/or relationship statuses to your lead
If you have notes or relationship statuses you want to include on the fly, you can do so on the Chrome Extension and it will be saved immediately and reflected on your NinjaOutreach account.
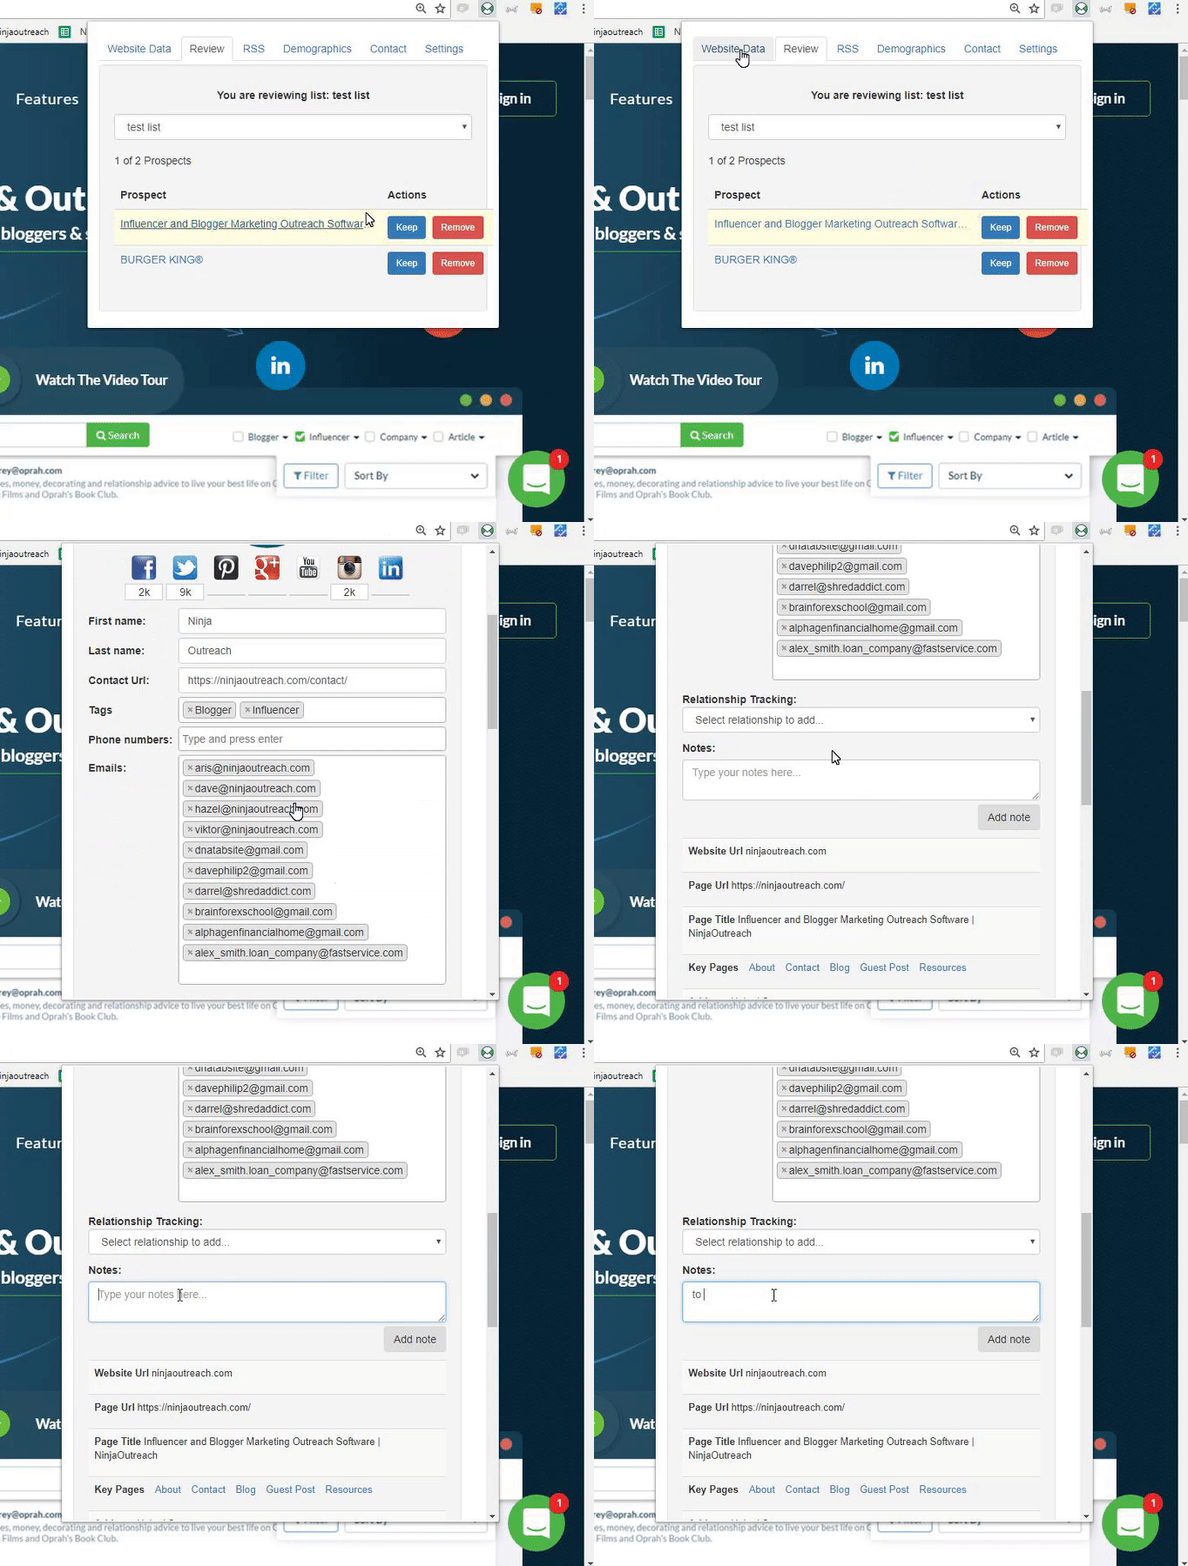
4. Keep or remove each lead
Choose to Keep or Remove your leads. Once a lead is removed, you’ll be redirected to the next lead’s site.
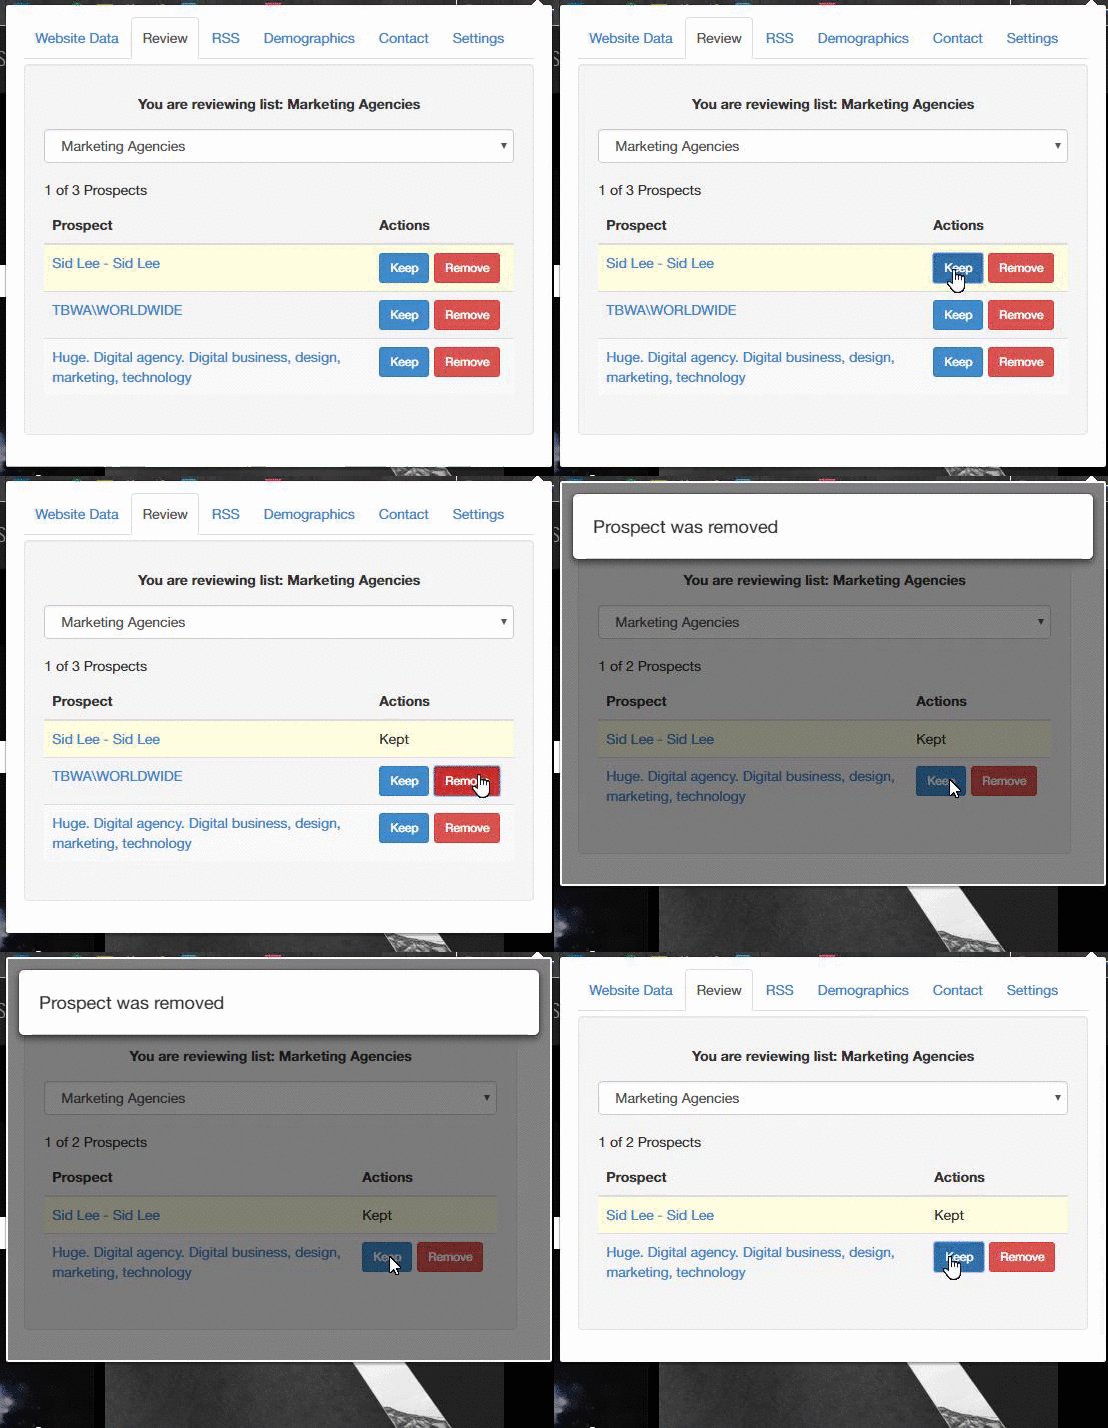
5. Adding Websites Through Google Search
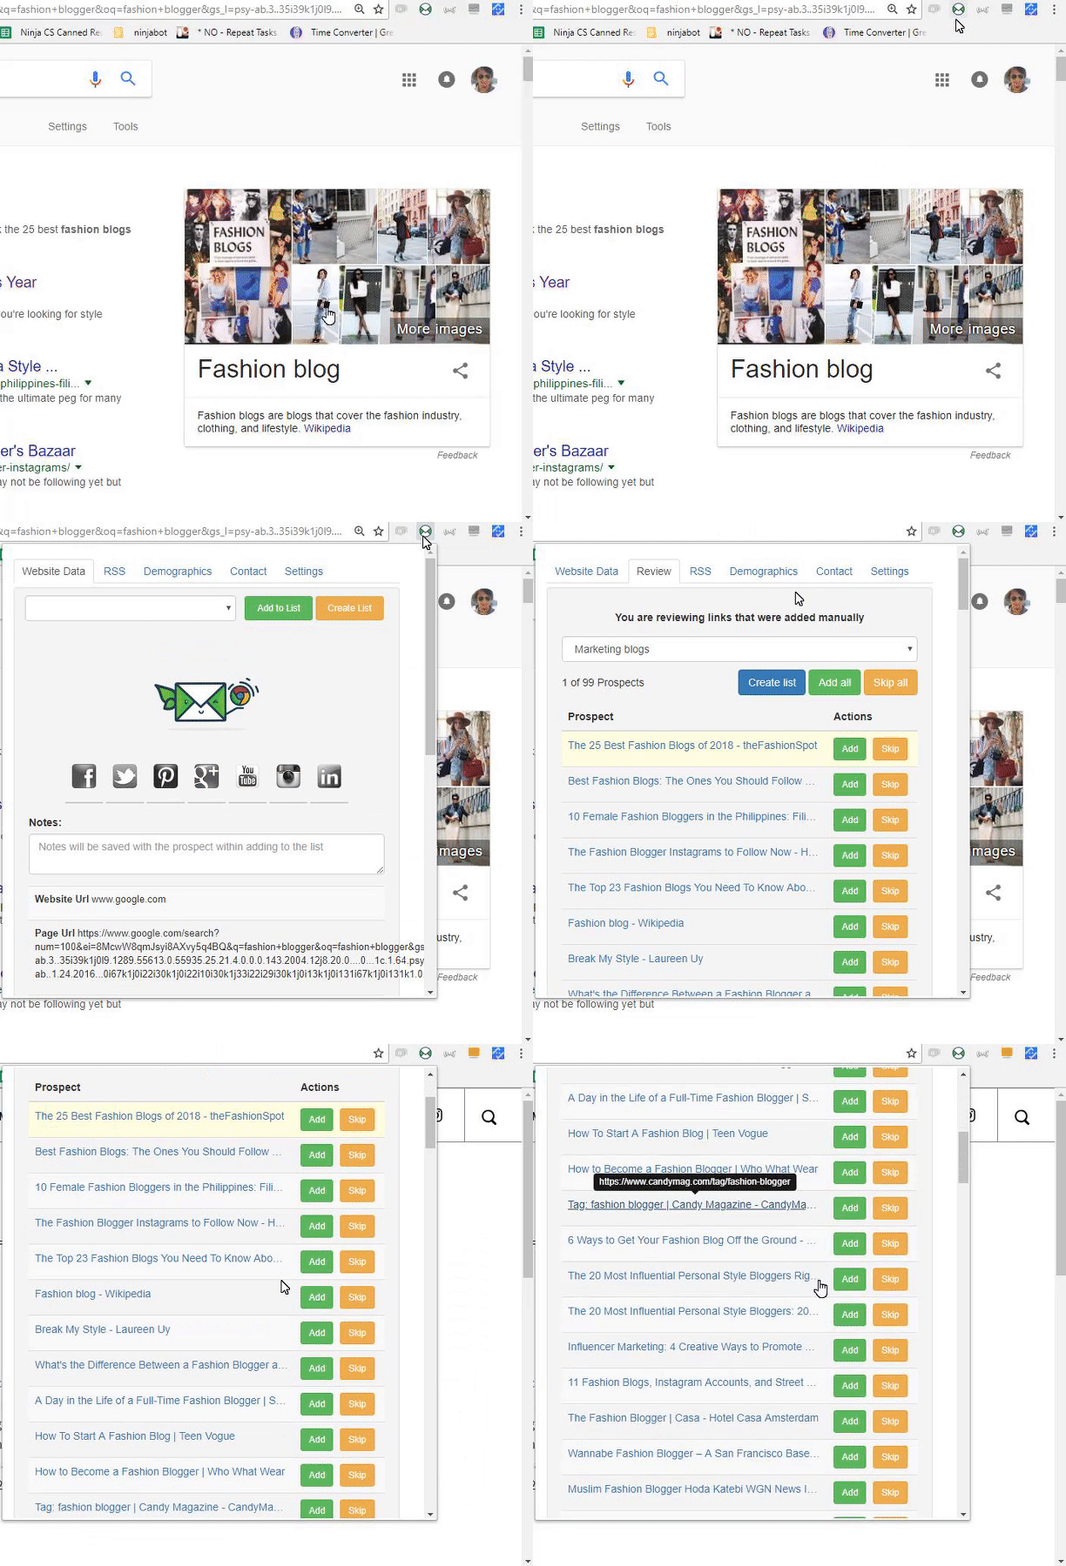
While you’re searching through Google, you can use the Chrome Extension to easily add all the links in a particular search result.
Here’s how:
Step 1: Search anything on Google

Step 2: Load links to NinjaOutreach
Right click any white space and select “Load links to NinjaOutreach”
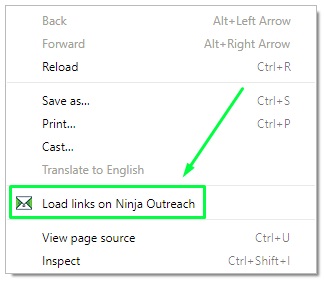
From here you can change the search on Google or continue to the next pages and keep adding more and more websites as long as you remain in that same tab.
You will receive a notification from the Chrome Extension, letting you know how many sites have been added and what to do in order to start reviewing them (Open the Chrome Extension).
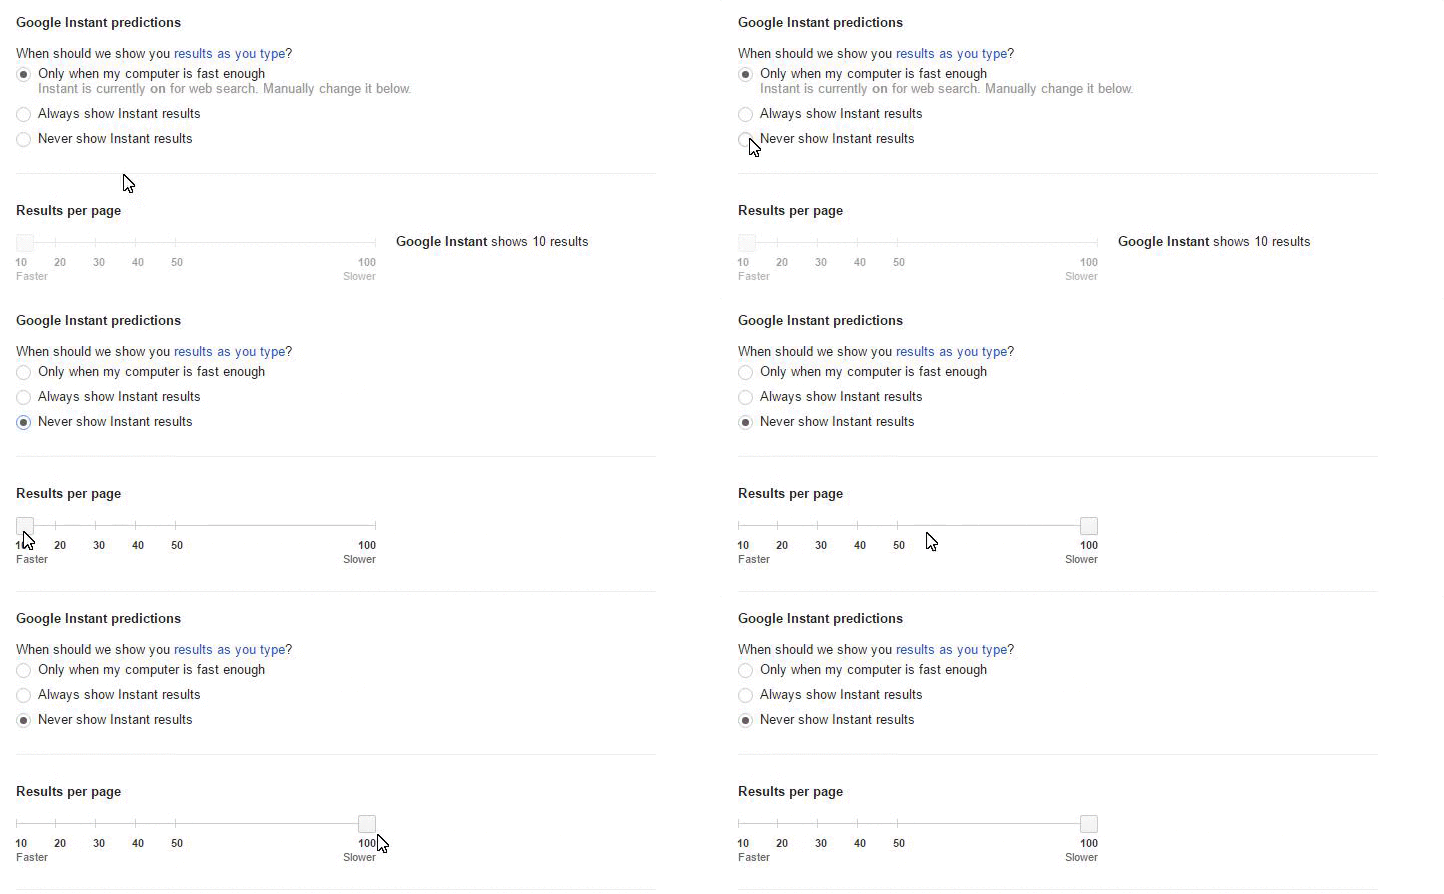
NOTE: You can also set your Google Search to show 100 results at a time to make it even more efficient.

Step 3: Open The Chrome Extension To Start Reviewing.
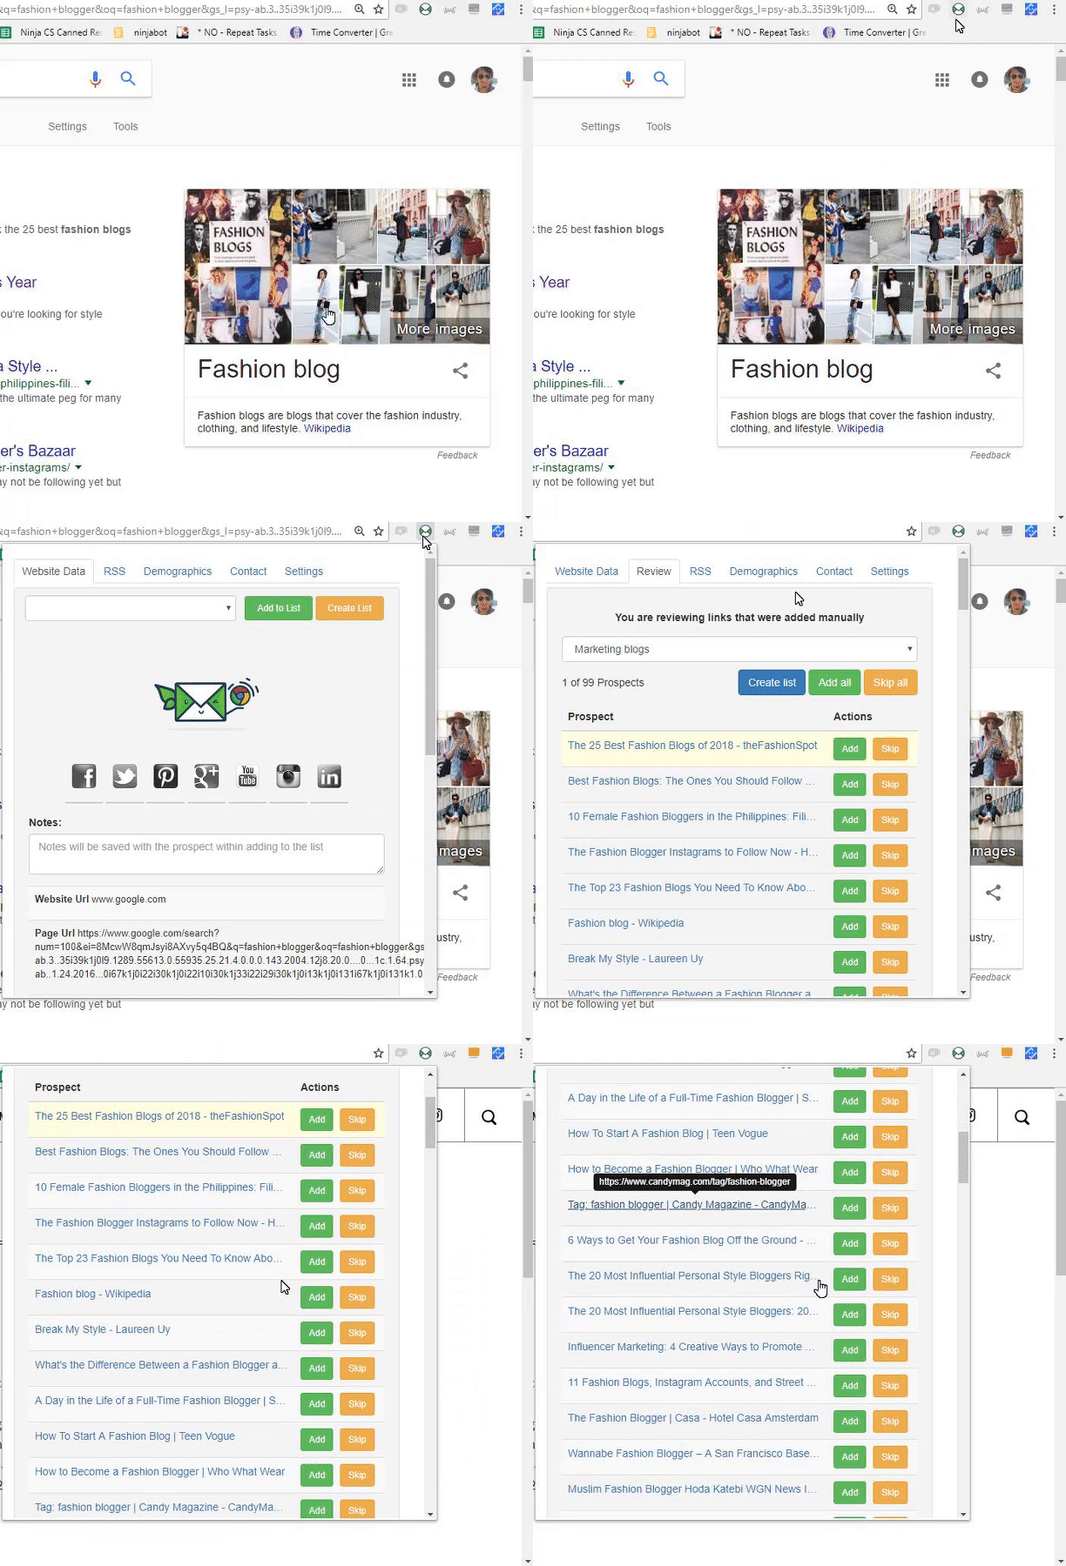
You can start reviewing the sites, by clicking Add or Skip, after clicking any of these and the Extension will automatically load the next page on the list.
You can review them on by one, or you can Add all or Skip all of them.
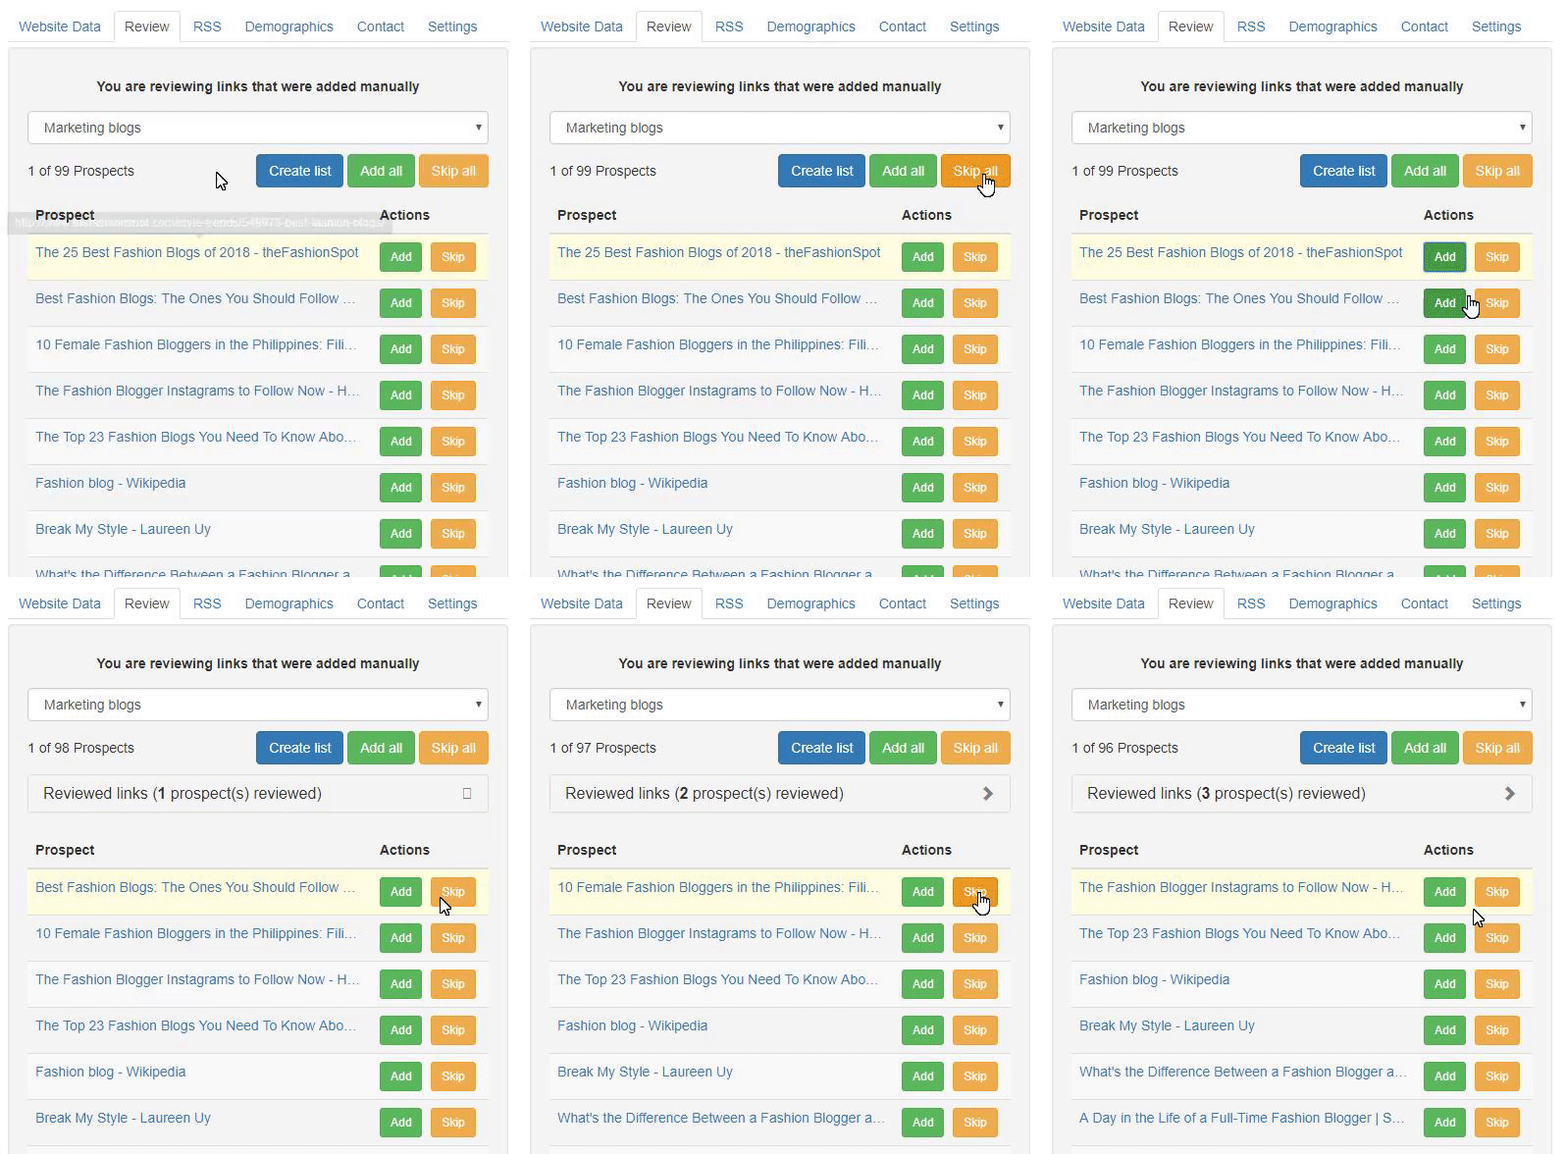
You may notice some of the sites appear to say will be crawled, meaning they might not appear instantaneously in your account list, but after the info is retrieved by NinjaOutreach these leads will appear.
Add Websites From Selection
You can highlight any text from top lists, articles, etc. And have all the links embedded in them added to your Ninja Outreach Account.
Step 1: Highlight the text that contains the links you’re interested in, or just Select All.
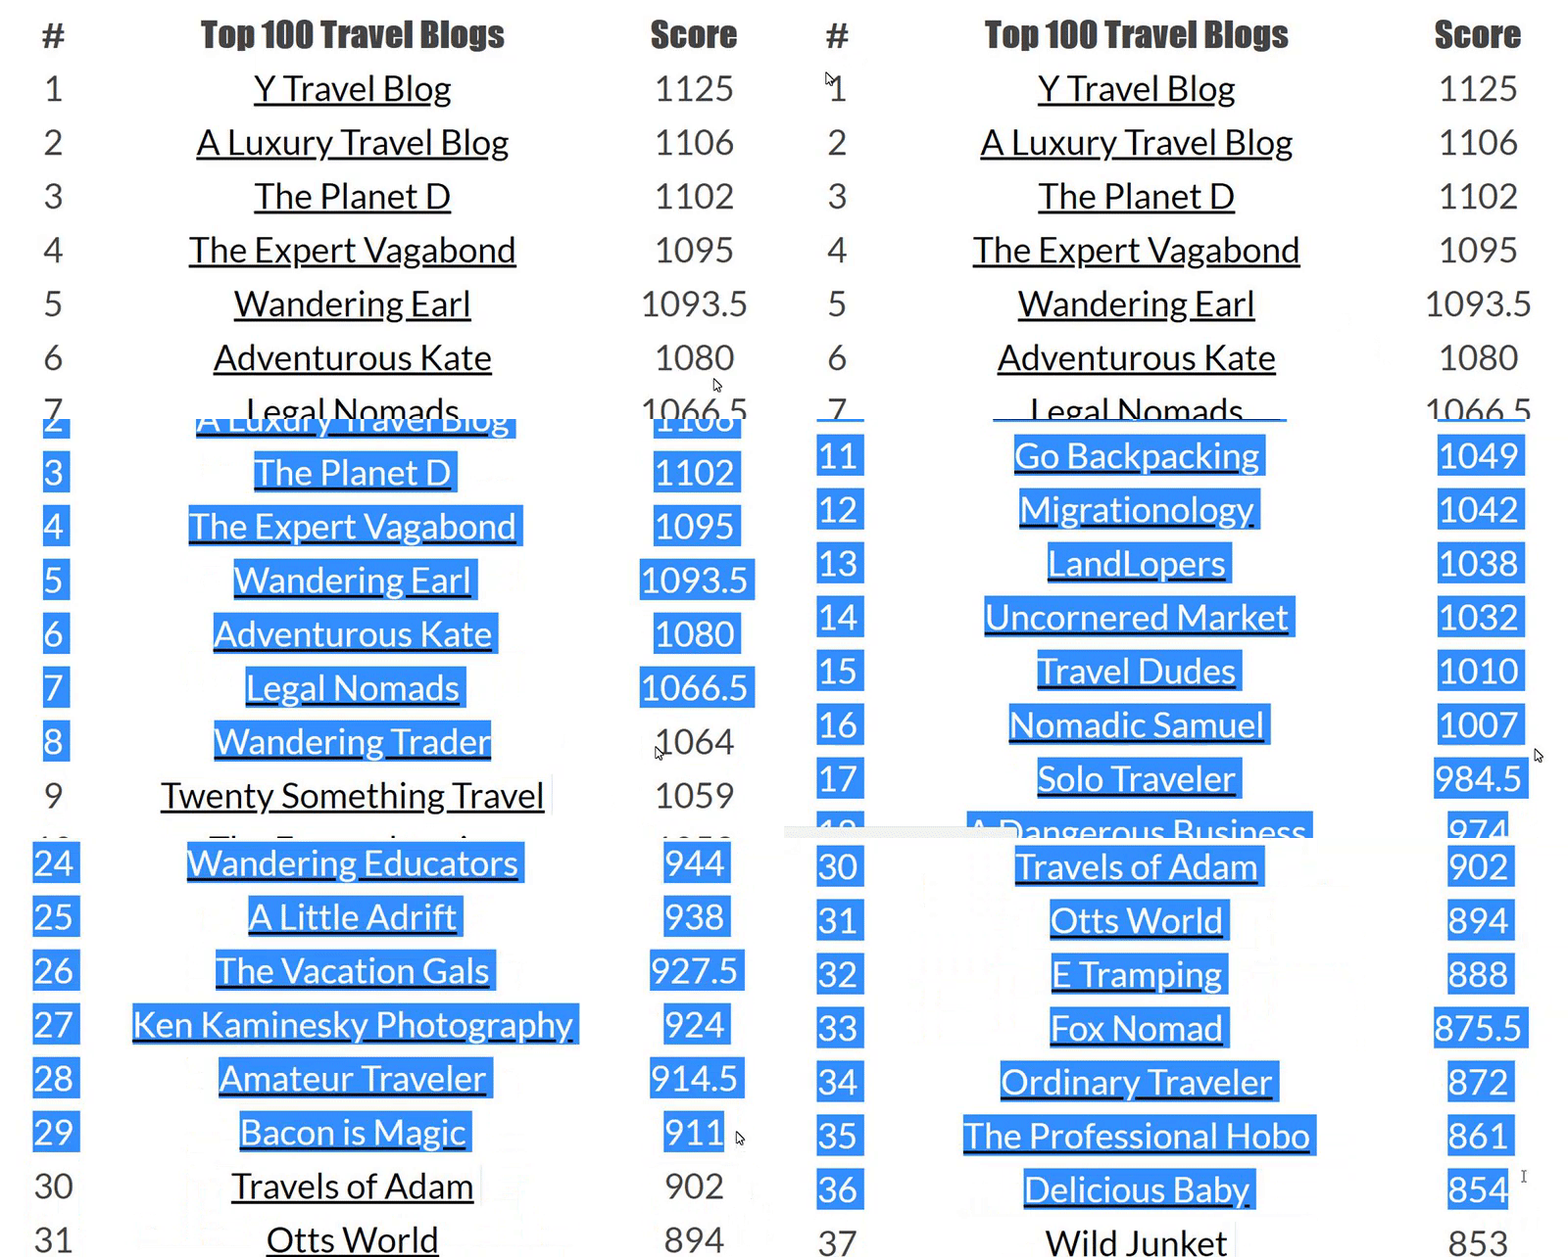
Step 2: Right click it and select Load Links to NinjaOutreach
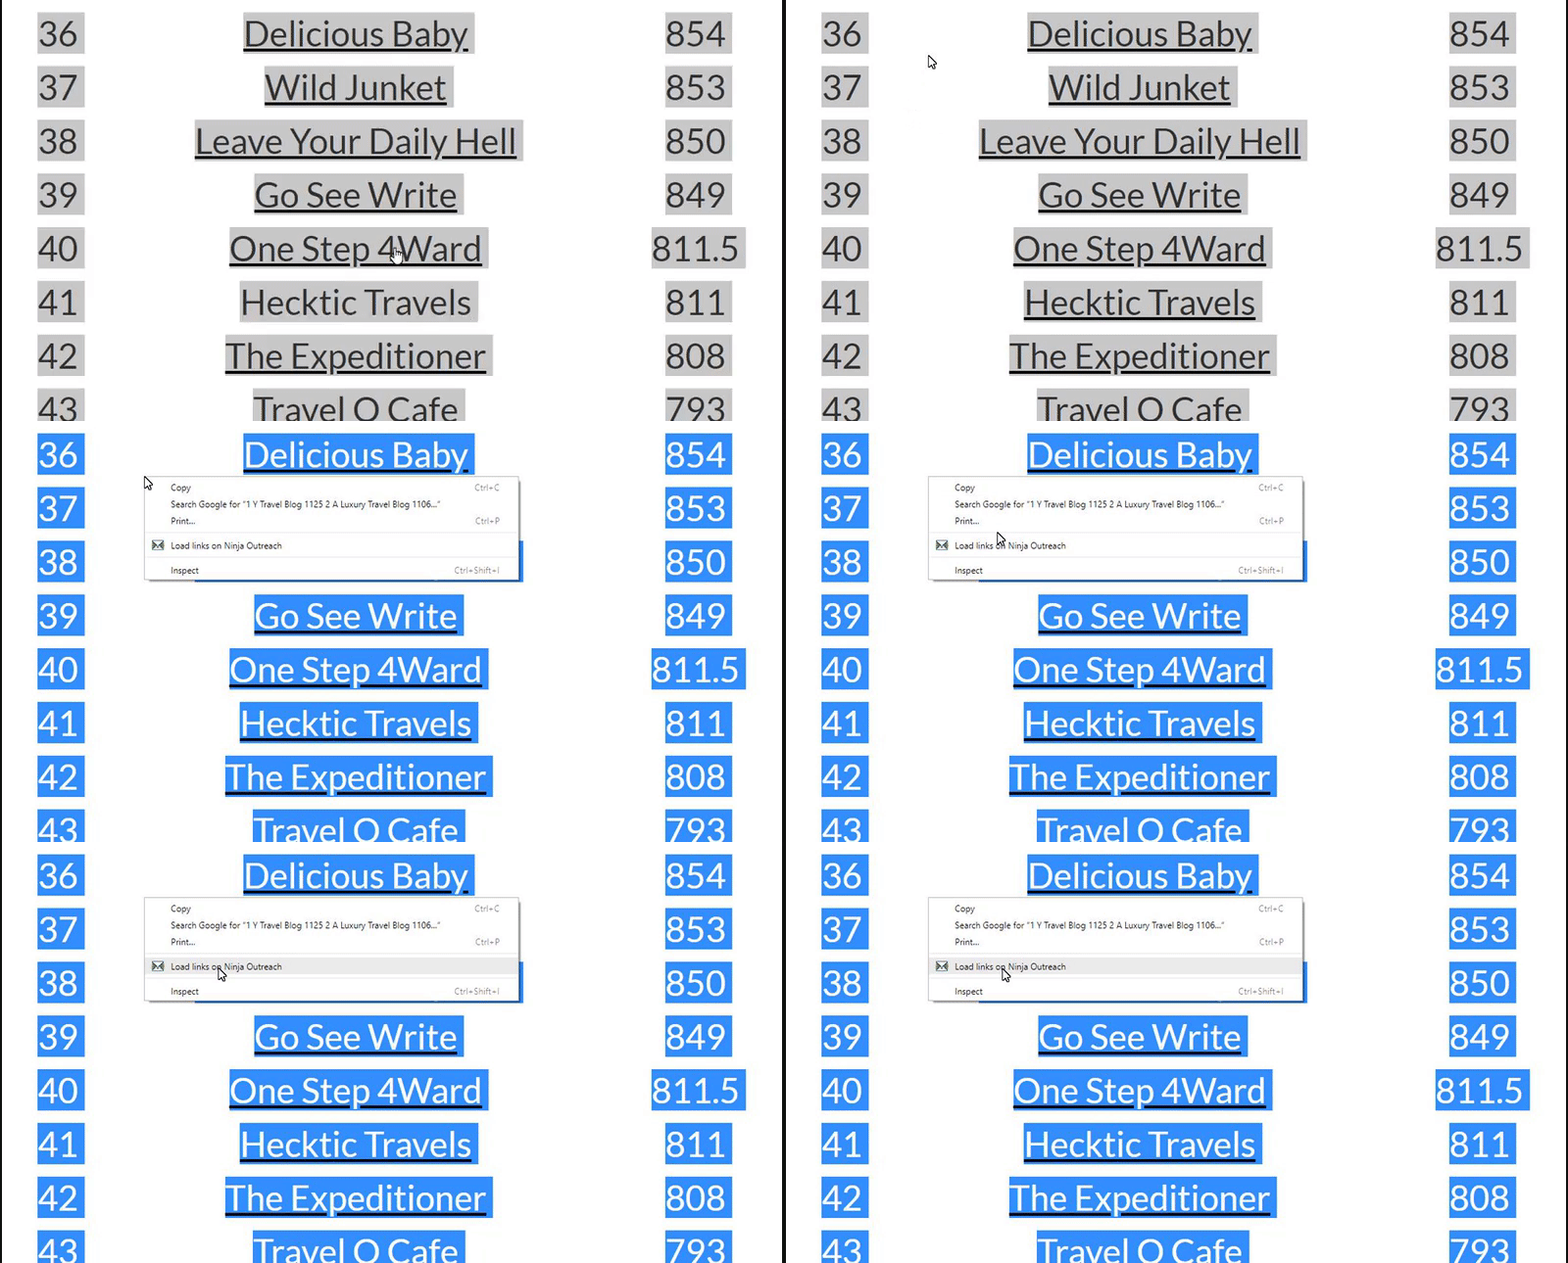
Step 3: Then you can review them just as if you have added sites from a Google search.
Congrats! Now you’ve learnt how to fully utilise NinjaOutreach’s powerful Chrome Extension to help you with your outreach on the go.

Leave A Comment?