But hey, we know you’d like some flexibility to flex your writing skills so here is a tutorial on how you can create your own custom templates, fix up some backup custom fields, and adding your own email signature.
Step 1: Create a Custom Template
Hover over the Outreach tab and click Templates
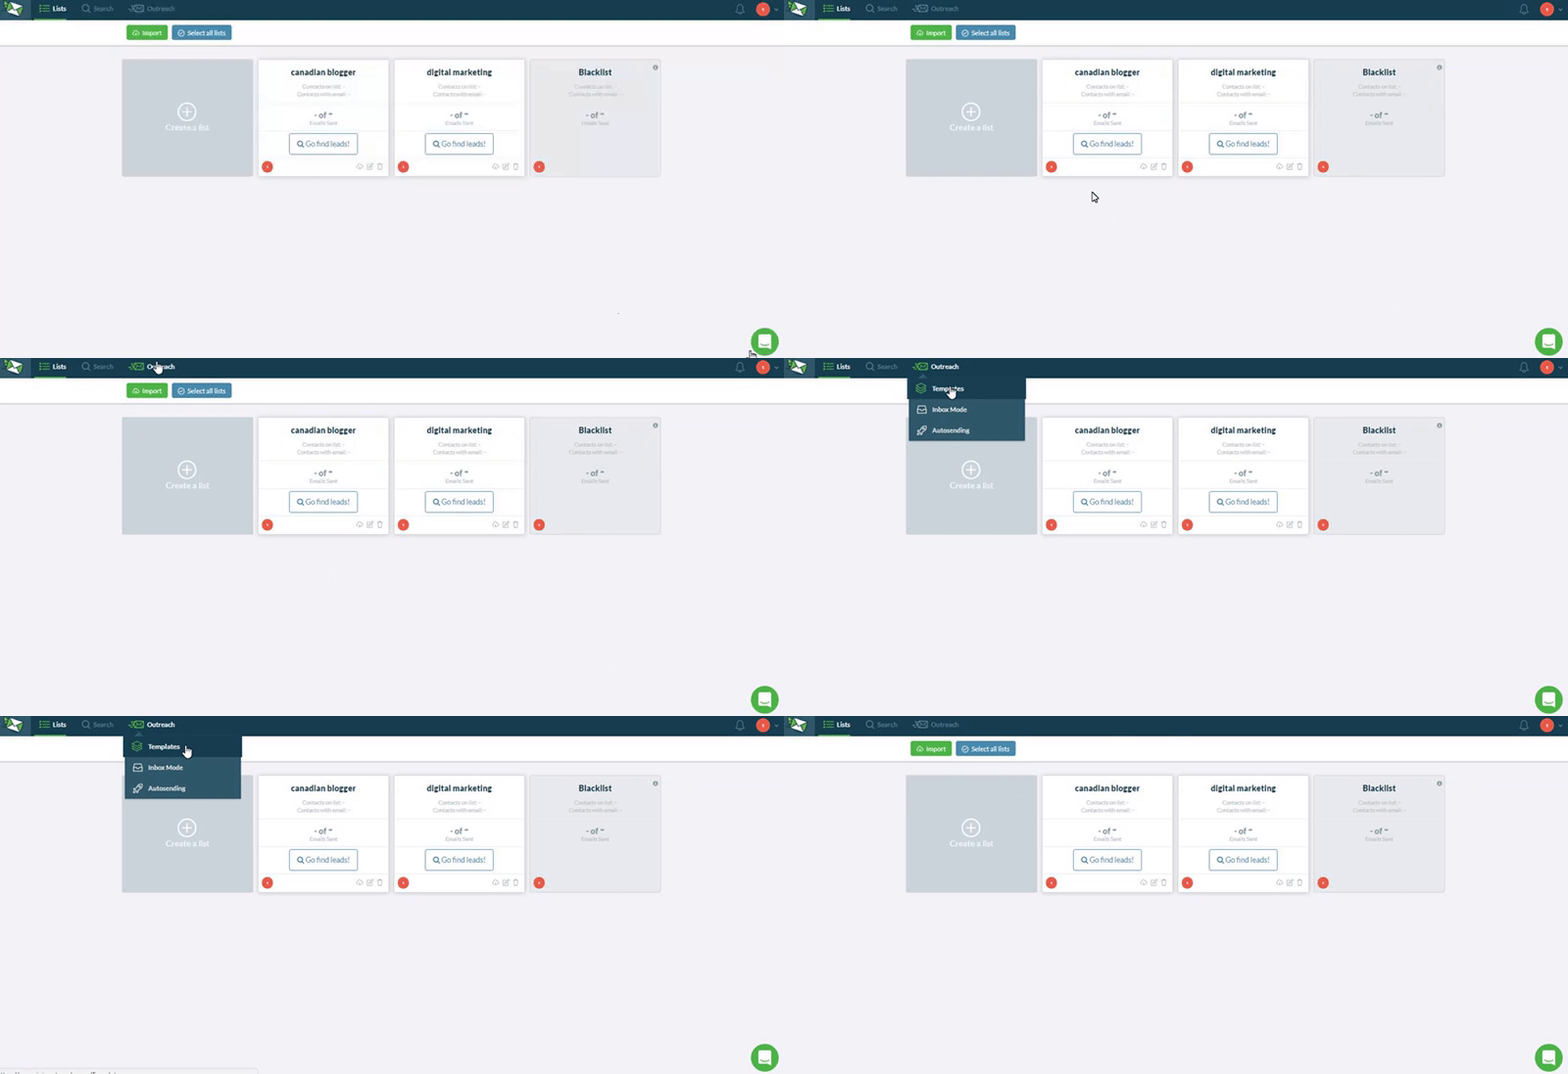
Then click on “Create Template” on the top left corner (green button).

Step 2: Use Custom Fields
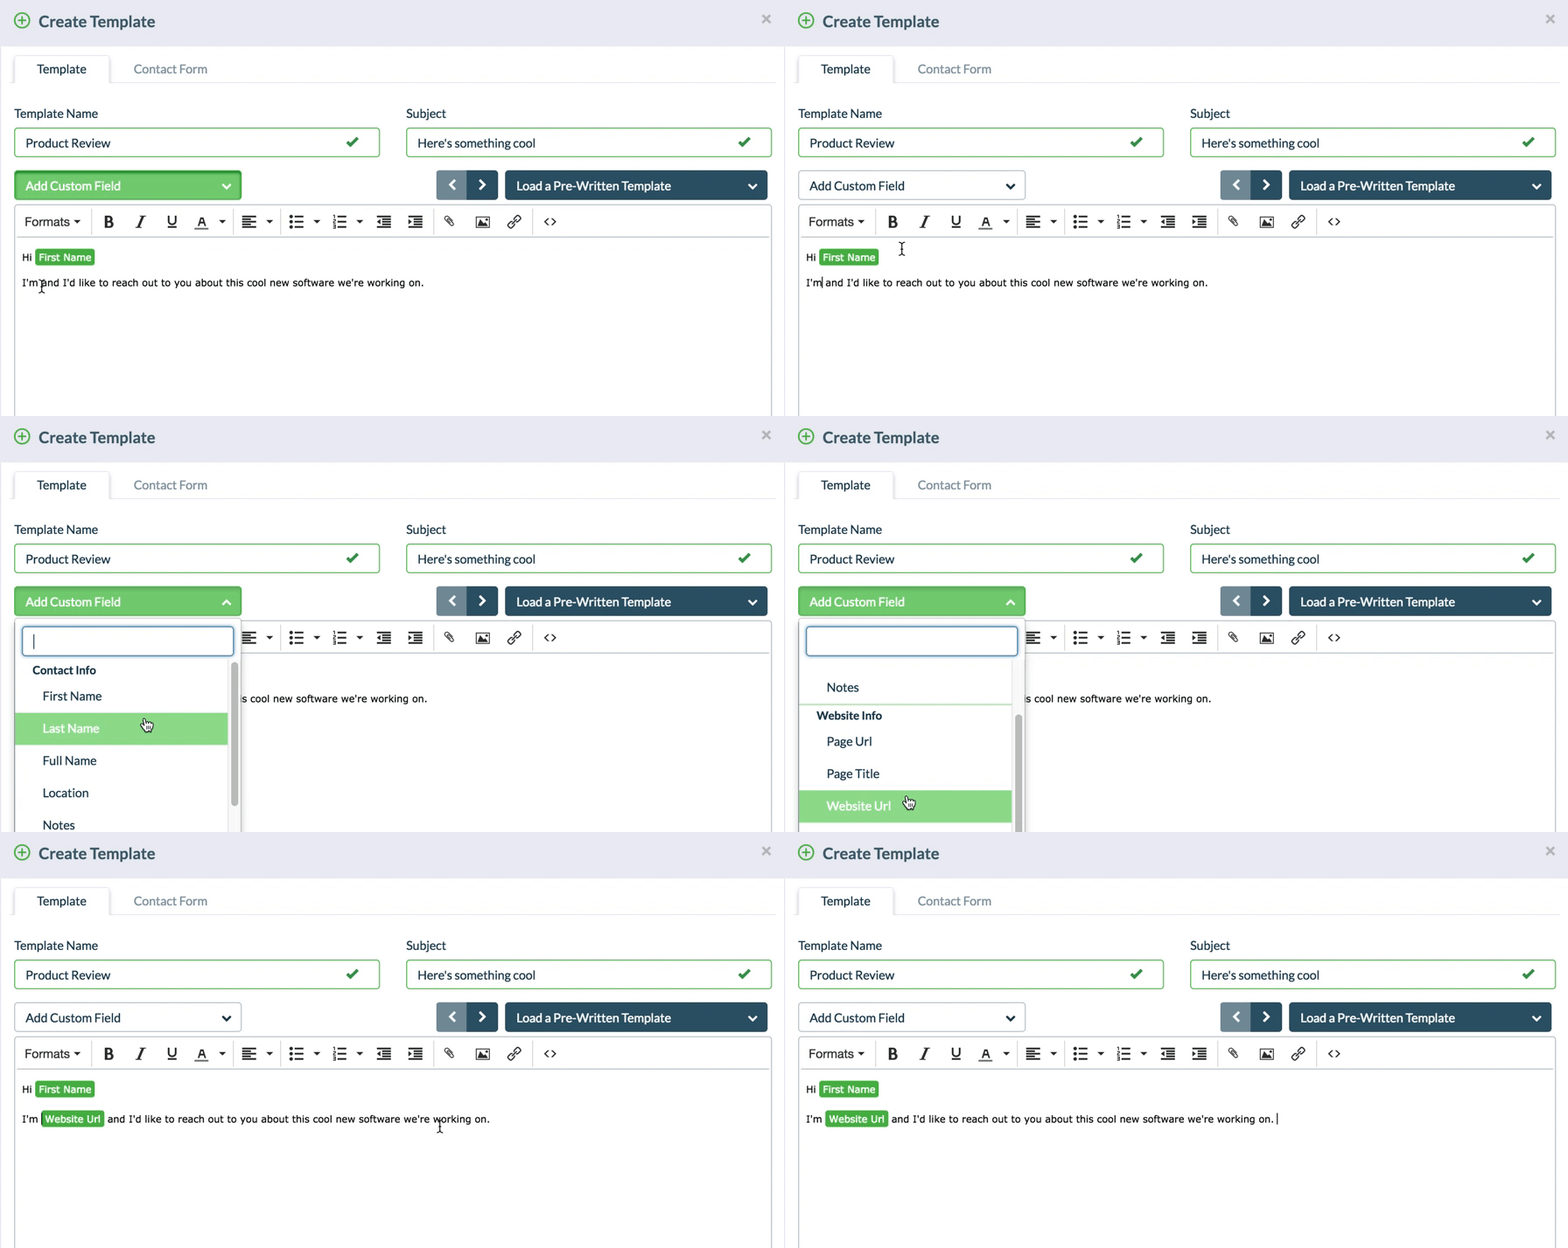
Go ahead and name your template and fill in the “Subject” and “Body” fields.
Then, make sure you position your cursor where you want to place your custom field and click “Add Custom Field” to choose your preferred field.
If your lead’s full details are available, it will be automatically populated when you use it.
What the Custom Fields mean:
Contact Info
- First Name – The lead’s first name
- Last Name – The lead’s last name
- Full Name – The lead’s full name
- Address – The lead’s address
Website Info
- Page URL – A post/page url on the website
- Page Title – The title of that page (will be hyperlinked)
- Website – The lead’s website
- Website Title – The title of that website
- Contact URL – The lead’s contact URL
- Keywords – The meta keywords for the website
Social Info
- Facebook URL – The lead’s Facebook URL
- Twitter URL – The lead’s Twitter URL
- Google Plus URL – The lead’s Google Plus URL
- Pinterest URL – The lead’s Pinterest URL
- Youtube URL – The lead’s Youtube URL
SEO Metrics
- Google Rank (PR) – The website’s Page Rank
- Domain Authority – The website’s Domain Authority
- Page Authority – The article’s Page Authority
- MozRank – The websites MozRank
- Alexa Links Count – Alexa’s number of reported backlinks to the website
Features
- Sponsored Post URL – A URL on the lead’s website we believe is a Sponsored Post
- Product Reviews URL – A URL on the lead’s website we believe is a Product Review
- Giveaways URL – A URL on the lead’s website we believe is a Giveaway
- Guest Post URL – A URL on the lead’s website we believe is a Guest Post
- Infographics URL – A URL on the lead’s website we believe is an Infographic
- Podcast URL – A URL on the lead’s website we believe is a Podcast
- Resource Page URL – A URL on the lead’s website we believe is a Resource Page
Step 3: Save
Once you’re done, save your custom template. You can now access it in Outreach Mode.
How To Include An Image In Your Email
There are 2 options to include images:
1. Include image(s) as an attachment
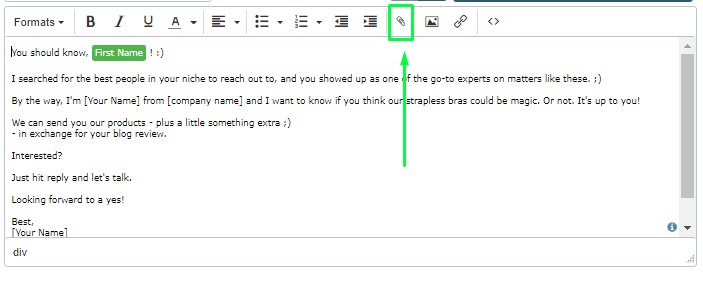
Click on the paperclip icon and then select the image you want to attach.
2. Include image(s) on the email body:
There are 2 ways you can do it:
A. For image(s) found on the web:
Right click on the image, select “Copy Image”, then simply paste it into the body of your email in Templates.
B. Images hosted by a server like WordPress
i. Upload the image on WordPress
ii. Go to the media file
iii. Get the WordPress URL
iv. Open the WordPress URL in a browser
v. Right click on the image and then select “Copy Image”
vi. Paste it into the body of the email
Template Click and Open Rate Tracking
You can see how many times each template has been sent as well as the open and click through rates (as a number or a percentage). You will find this to the right of each template.
![]()
All tracking is unique; so, if a lead opens the email twice it will only be counted as one open. Similarly, if a lead clicks multiple links in a template (or a link multiple times), it will also count as only one click. This will give you an accurate way to compare different templates.
For example, you will be able to deduce:
- Which subject lines are the most effective (highest open rate)
- Which link placements are getting the most clicks (highest click rate)
- Which outreach templates are sending the most traffic (highest open rate * highest click rate)
This will allow you to focus on the ones that are delivering the best numbers!
How to Turn Off Click Tracking
You can remove click tracking for each individual template by deselecting “Track URL Click Rate”, or “Track Open Rate” at the bottom of the card.
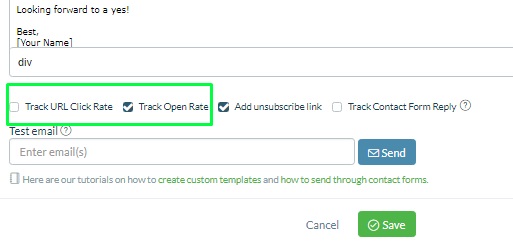
Note: When tracking is on, it will first redirect the link through our servers so receivers might see a flash of app.ninjaoutreach.com before reaching their final destination.
Adding Backups To Custom Fields
Here’s the thing with Custom Fields: sometimes, when you have them and your lead’s details are not available, it will be left blank. Sure, you can leave it at that, but to add some variety, you can include a backup custom field.
For example:
Custom Field: Hi [First Name | there]
Which will either appear like this:
Hi Dave or Hi there (if the lead’s first name is unavailable)
You can play around using the same logic such as: Hi [First Name | There | You],
Which the system will randomly choose between “There” and “You” in the event the custom field is blank.
Finally, you can create variations in sentences using the custom field format, such as: [I was reading your blog | I was checking out your blog]
And the system will randomly display one or the other option during the outreach process. This allows you to add variety to your template sentences and makes it less likely that you will run into spam issues.
How To Include A Signature
To a recipient, your signature plays a crucial role in determining the importance of the email. It helps answers questions like: who sent it? What is their designation? Do I know them? – you get the idea.
Therefore, you’d want to create a unique signature/sign off that represents you and your company, authorizing that you, indeed, are the sender.
How to Create a Signature
To create a signature, go to Templates then click Create Template.
Then, enter your preferred signature text and format it to your liking.
Tip: To remember it easily, type “Signature” as the Template Name and Subject!

How to Add Links to Signature
To insert links, just highlight the word/phrase then click on the chain icon.
Enter/paste the URL and choose its behaviour (“None” to open in same tab or “New tab”) on the Target dropdown menu.
Click “Ok” to save the link.
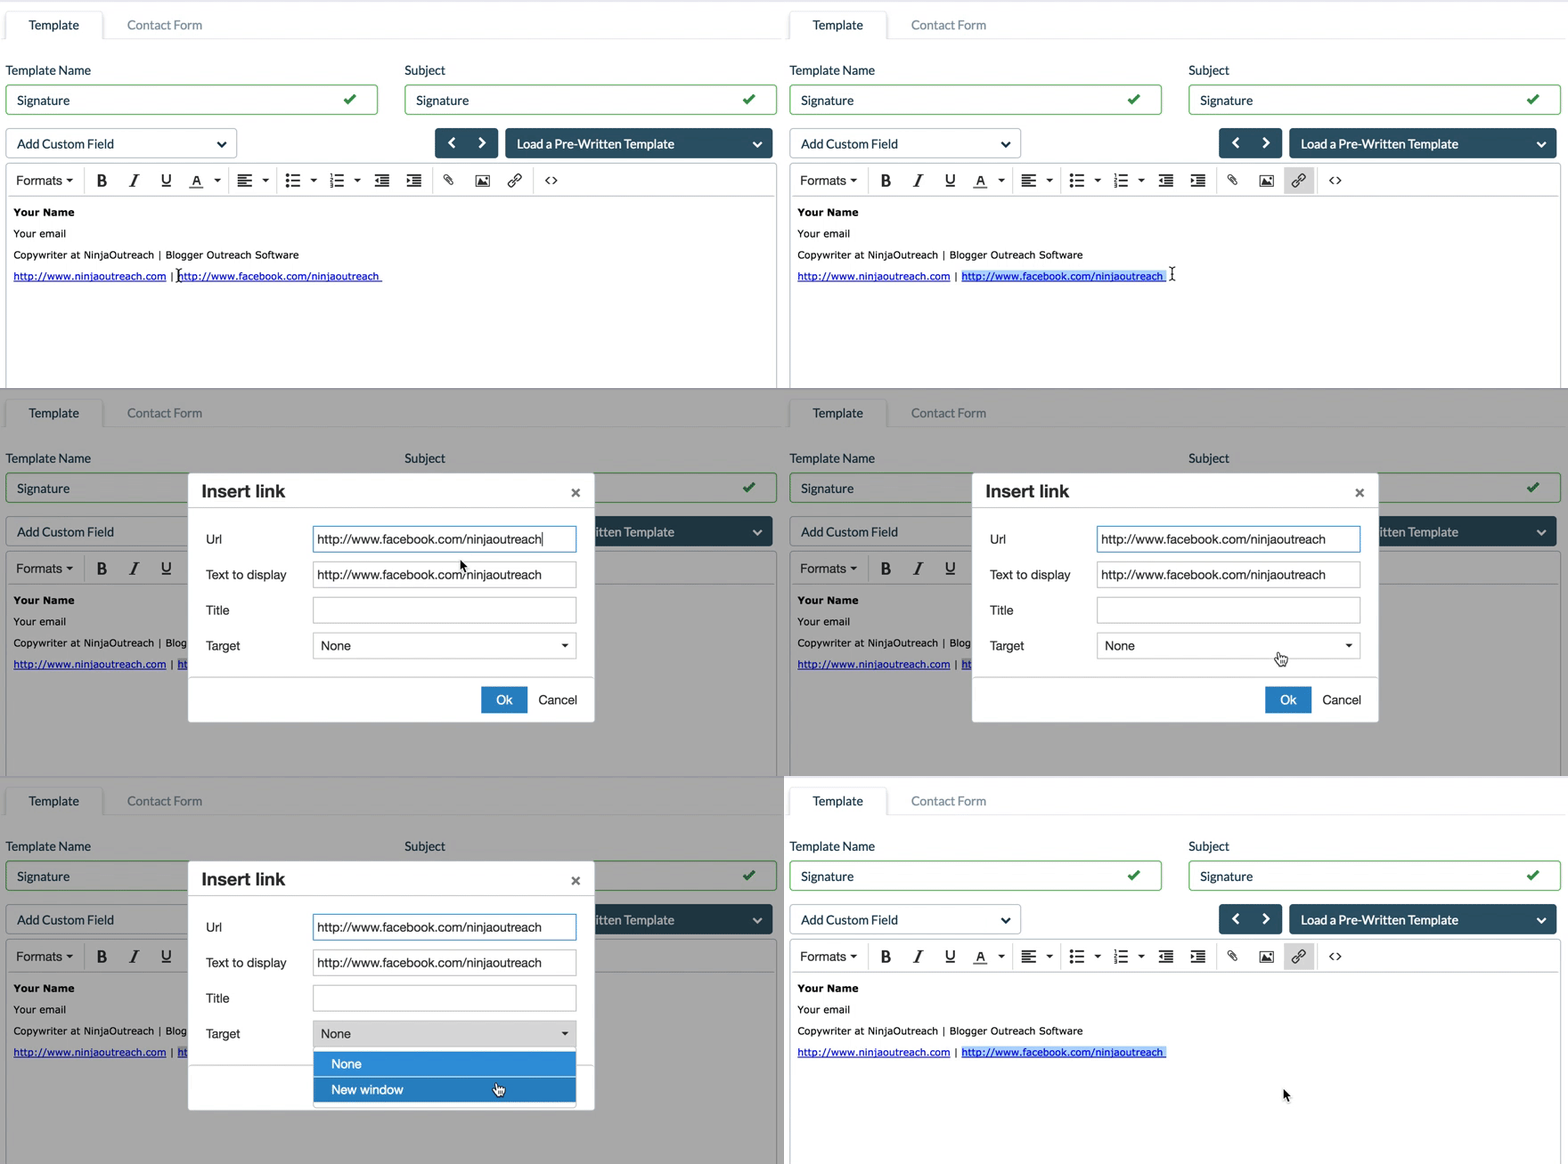
Once you are satisfied with your signature, hit Save. It will appear on your Templates dashboard.
How to Include My Signature to a Template?
To include your signature in your template for an outreach, you will need to copy your signature from your “Signature” template to the outreach template you are working on.
Here’s how:
Step 1: Open “Signature” in new tab; then, open your outreach template/Create Template in another.
Step 2: Copy your signature from “Signature” tab and paste it into the body of the outreach template.
Step 3: Hit “Save”.
If you want to add an image to your signature, please refer to the section “How To Include An Image In Your Email” of this article and go to number 2 for the steps.
What about CAN-SPAM Compliance?
You can read all about it here: CAN-SPAM Act: A Compliance Guide for Business
To ensure your emails are CAN-SPAM compliant, the “Unsubscribe Link” is automatically checked for each template.
[IMAGE]
According to CAN-SPAM, we want to practice the following:
- Don’t misrepresent who you are
- Don’t use misleading subject lines
- Identify if the email is an ad
- Include your business address
- Give them an opt-out option
- Honor opt-outs
The [bold] fields are information about yourself to fill in, whereas the final line contains a link, that, when clicked, will do the following:
- Take the user to an opt out page (see here)
- Label them as Do Not Contact in your list (see here)
- Restrict them from being contact again in NinjaOutreach
Know what others do/send on your behalf!

Leave A Comment?