To maximise your NinjaOutreach account, we always recommend that you integrate your email into it. It makes outreach so much faster and easier.
Here’s how you can do so:
How To Integrate Your Email Account
Note: Please make sure if you are using IMAP that you have enabled that on your mail client.
We cover all email clients so long as IMAP is enabled.
Start by clicking “Connect an Email account (IMAP)” and fill in the relevant fields with your IMAP details.
Not sure what your IMAP details are? You may need to search individually for how to do that on your specific email client as they can differ from each other.
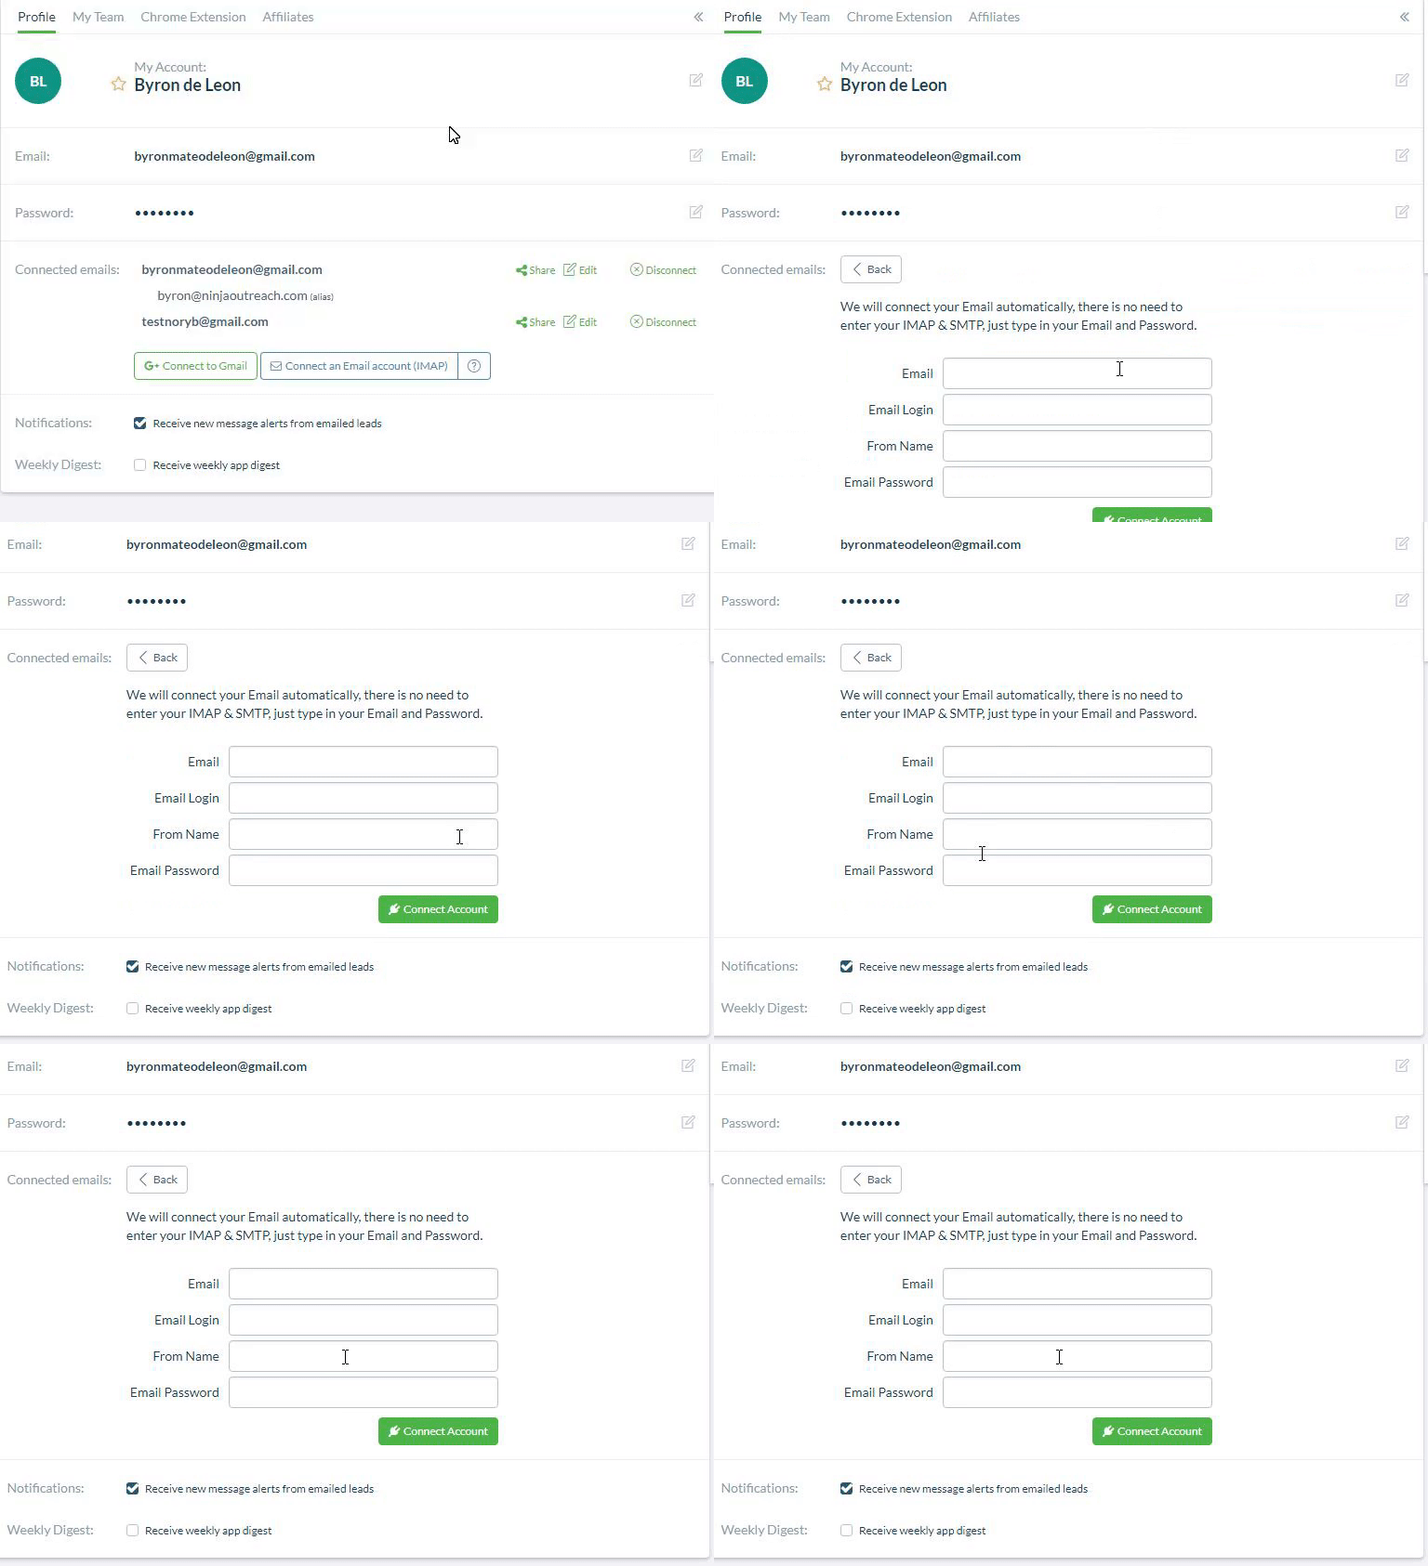
Tip: Here are some suggested IMAP and SMTP ports that you can try if the recommended ports given by your email client do not work:
IMAP Port: 993
SMTP: 465
How To Send Emails in Outreach Mode
(Looking for Automated Campaigns? Scroll down further…)
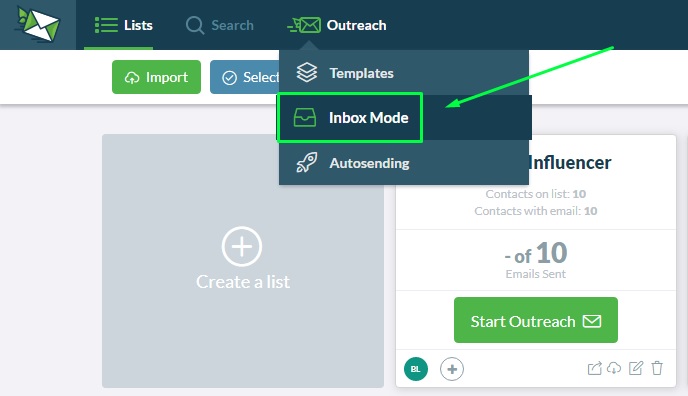
Head to Outreach and select Inbox Mode.
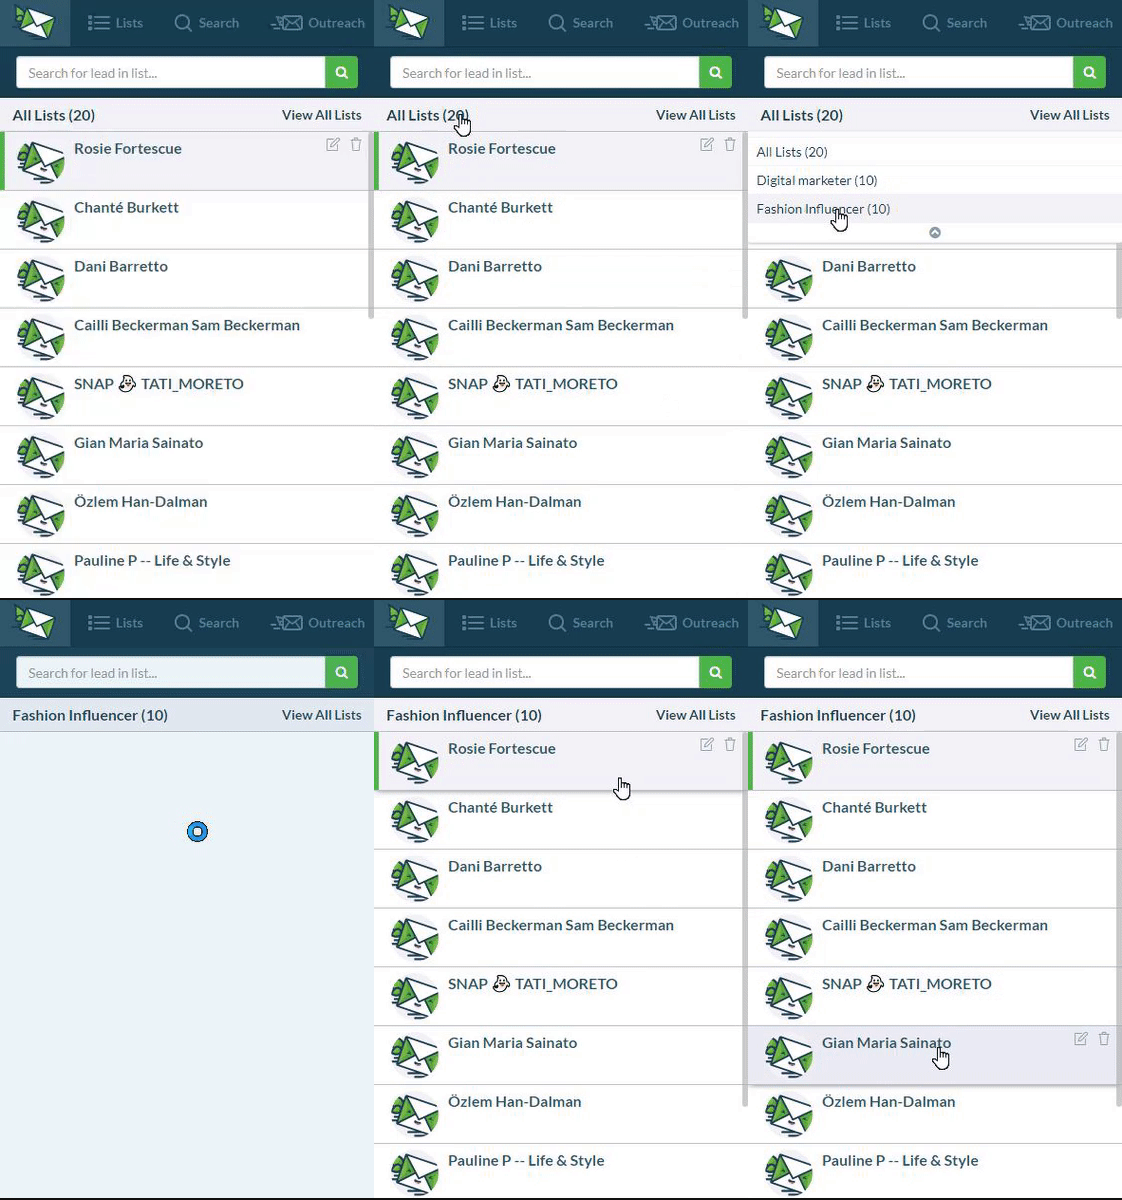
Then, select the list you want to email to…
Select the template you want to use. Each template will auto-fill the subject and the body fields as well as any custom fields according to the available data.
Then, select the “From” email you want to use.
Lastly, click on the first lead in the list to load their email address.
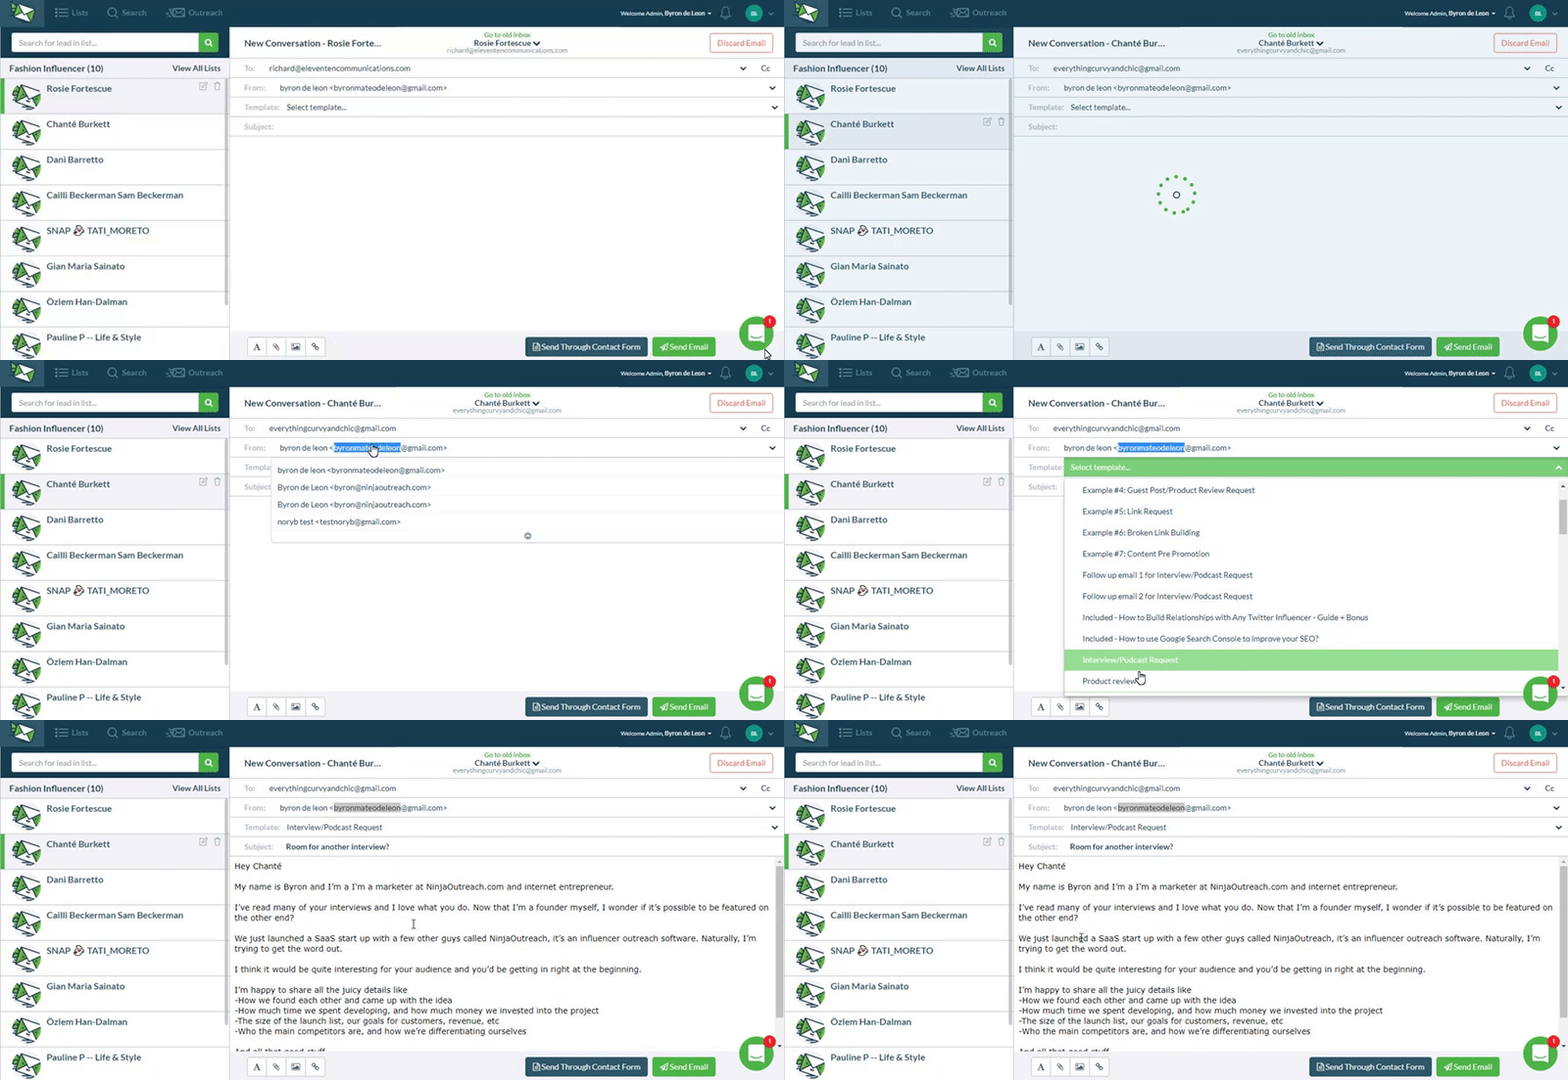
Then click ‘Send Email’ when you’re done.
From then on the next lead on the list will auto fill. Simple!
Pro Tip: How To Send Emails Fast!
This is the process we recommend for the most efficient email sending:
Send to all who has an email address:
- Load your list
- Click Filter lists and under “Email and Contact URL”, select “Has Email” to load only those that have an email address. Then, close the filter box.
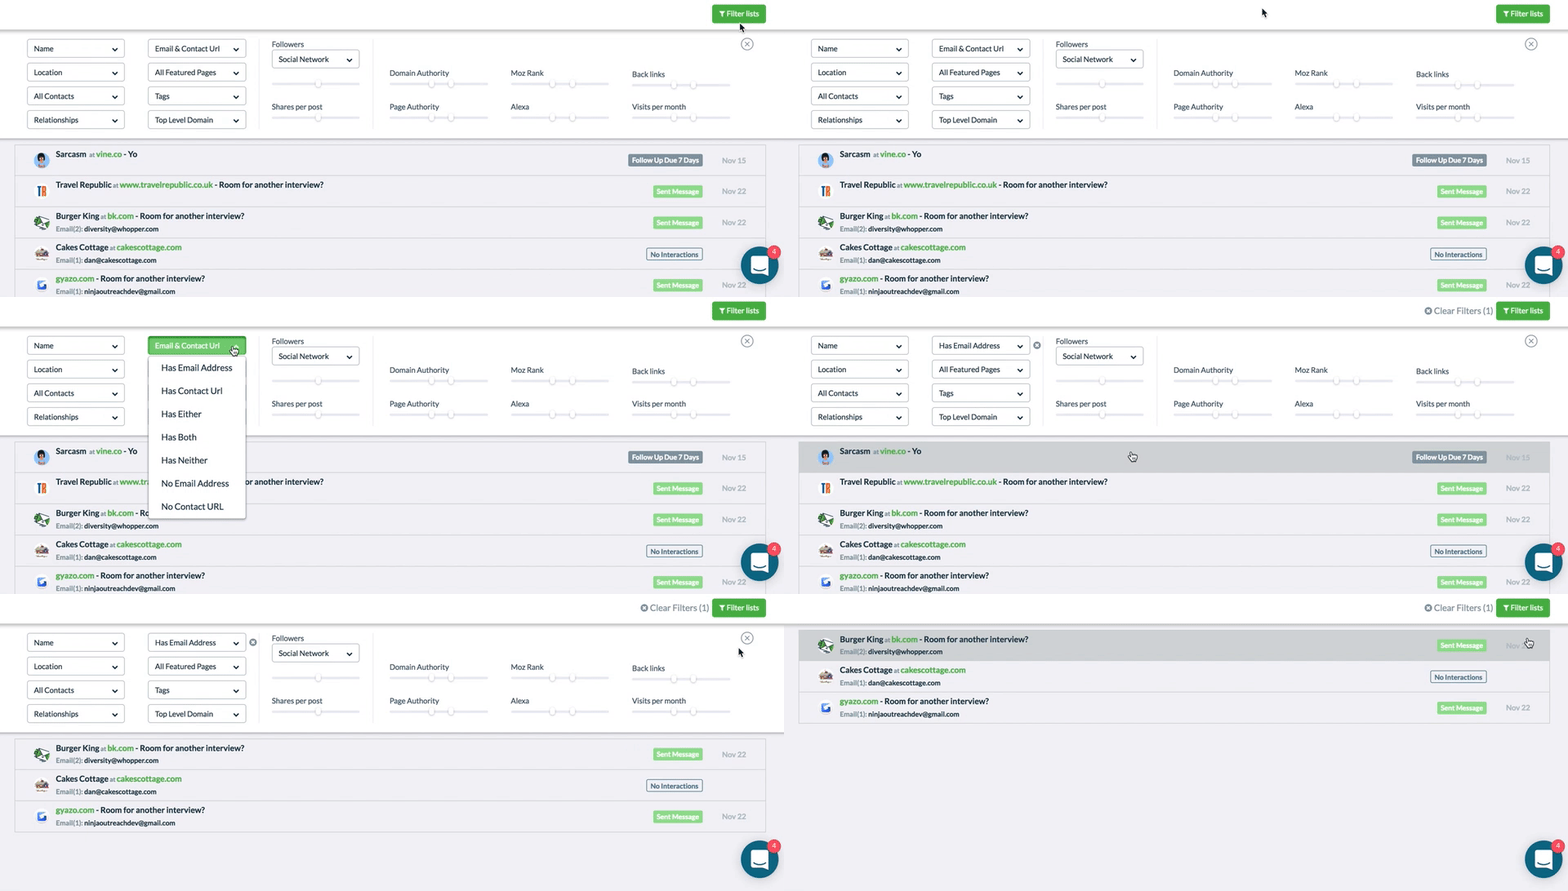
Then, go ahead and send your emails.
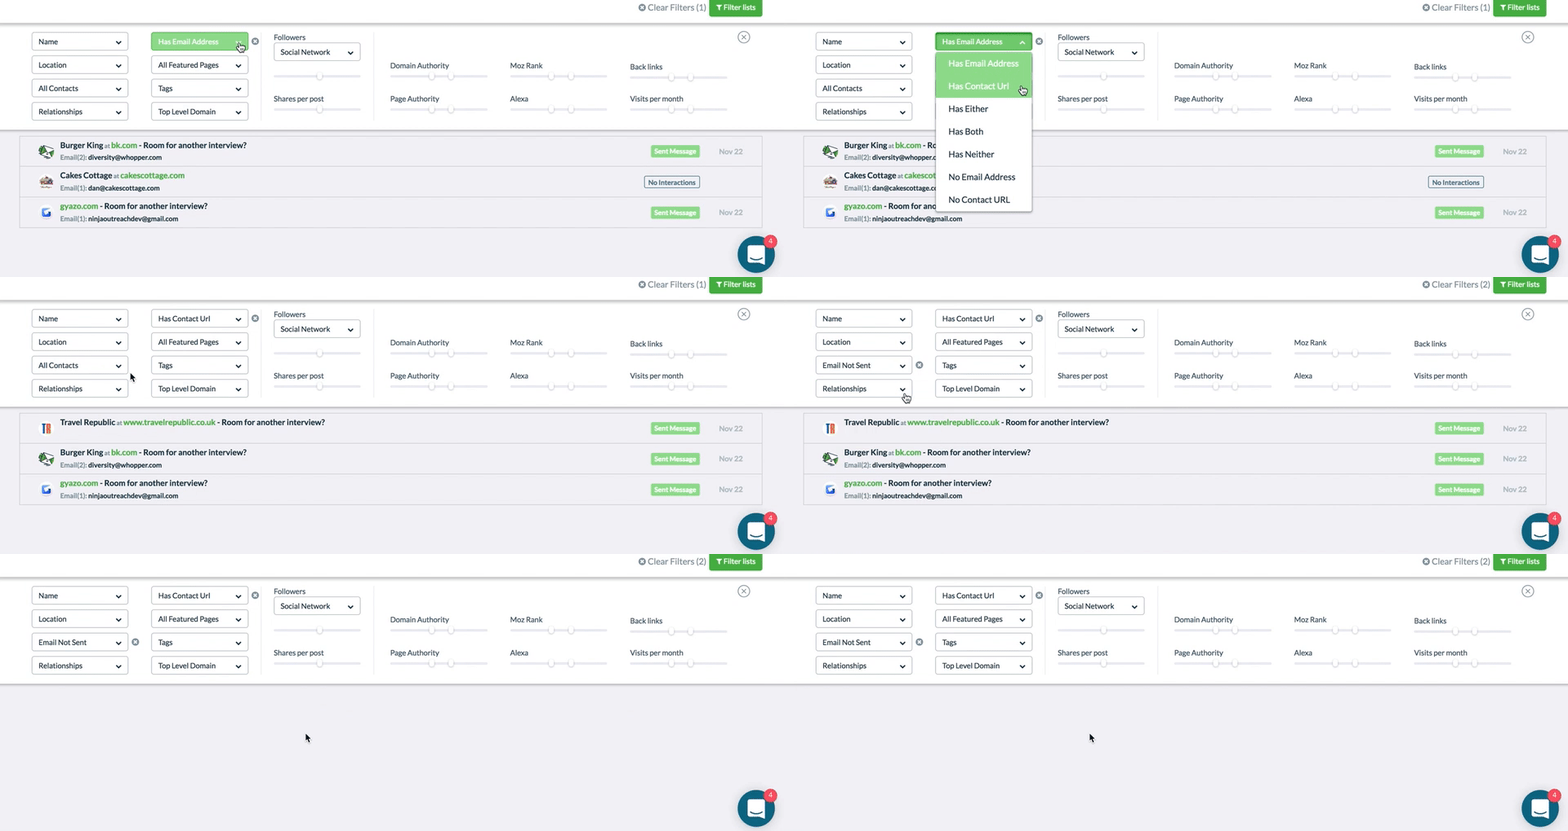
Next: Send to all who has a contact URL
- Go back to your “Filter lists” and select:
“Has Contact URL” under “Email and Contact URL”
“Email Not Sent” under “All Contacts” - Send to all leads listed through contact form.
Don’t know how? Check out this tutorial to learn how.
Potential debugging
Issues with emails rarely happen but when they do, there are the common issues:
- You’re frequently getting logged out of your account
- Emails are not sending, or delayed.
- You are not getting replies. (if this is the case, make sure that the emails are appearing in your Gmail, from the same email which you sent. It is the only way we can retrieve it).
If you experience any of these issues, try the following (while logged into your Gmail):
- Confirm that you are enabling (turn on) Less Secure apps https://www.google.com/settings/security/lesssecureapps from this link
- Go to https://security.google.com/settings/security/activity and see if there is anything blocked
- Turn off two step verification
- Revoke access to NinjaOutreach and reintegrate it on your settings page in our app (this refreshes our access token)
How To Do Automated Email Broadcasting
So, email broadcasting allows you to set up automated outreach campaigns so you don’t have to do them one-by-one.
Note: This is only for plans from Small Agency and above. Currently, there is also a limit to sending 200 emails per day per individual email accounts, which includes active campaigns and follow-ups.
Step 1: Schedule a Campaign
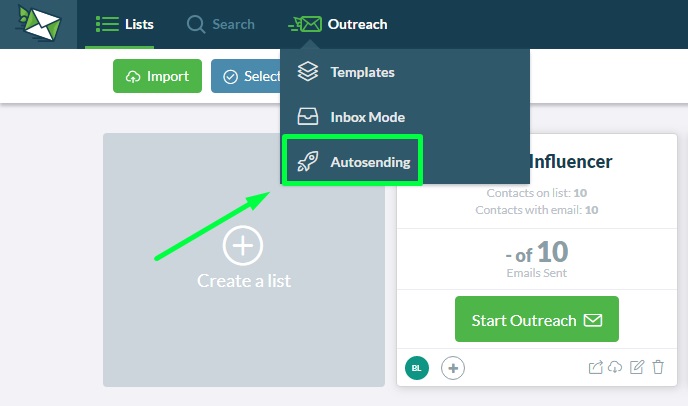
Head to Outreach and select Autosending.
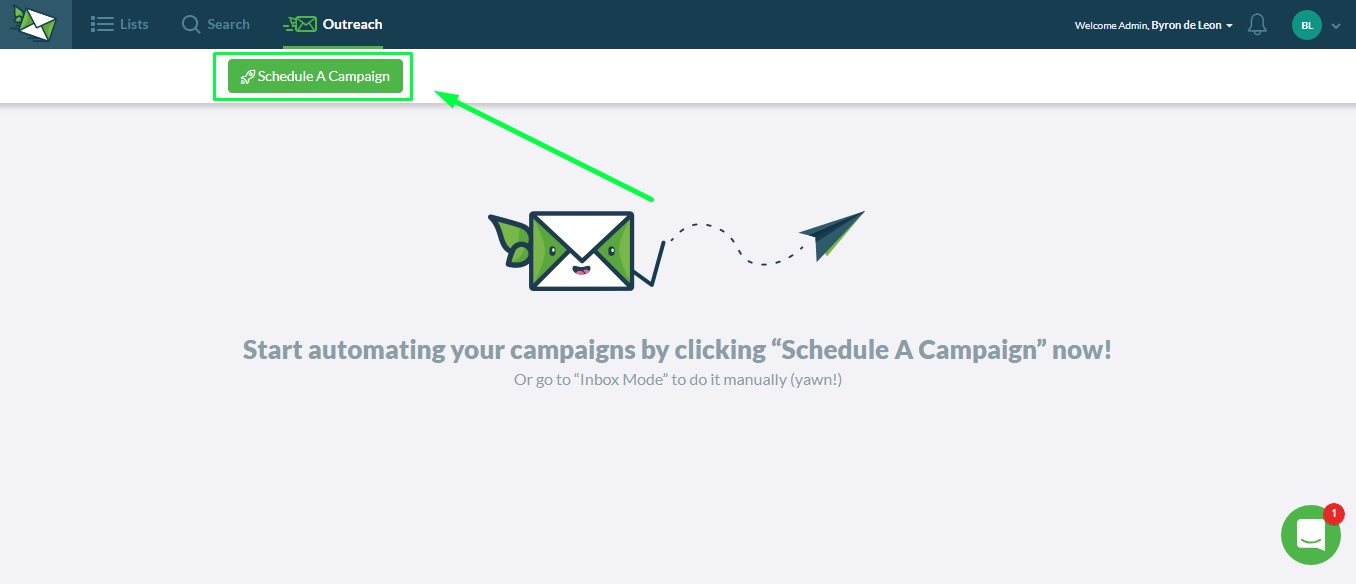
Then click “Schedule a Campaign” to get started!
Step 2: Add the necessary info
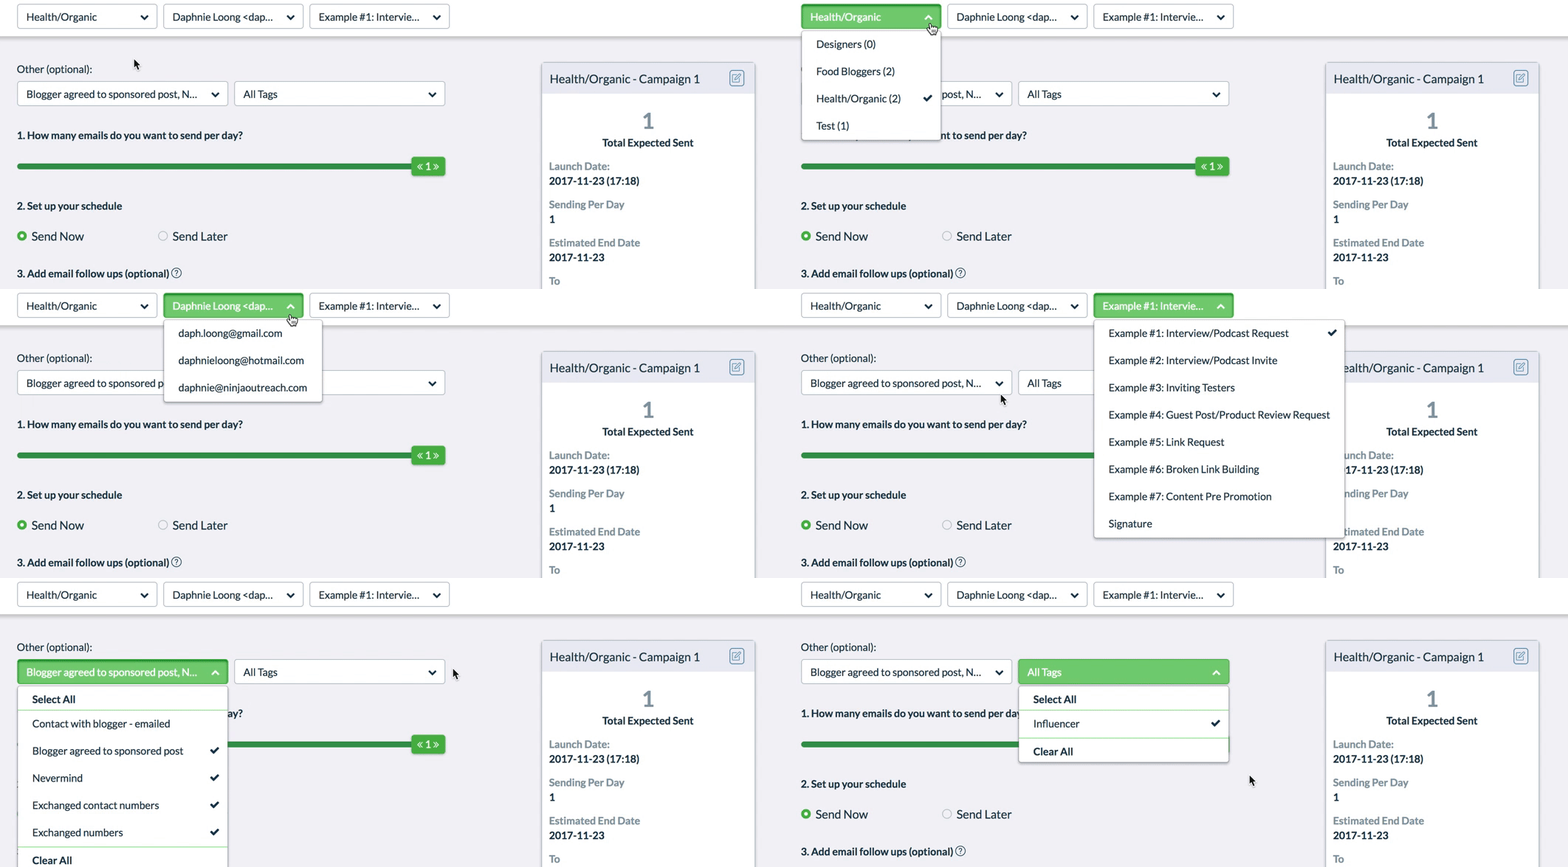
Simply select your list, choose a template, select your “From” email to begin with.
In here, you can even opt to filter by Relationship Statuses or tags!
Step 3: Select the number of emails sent in a day
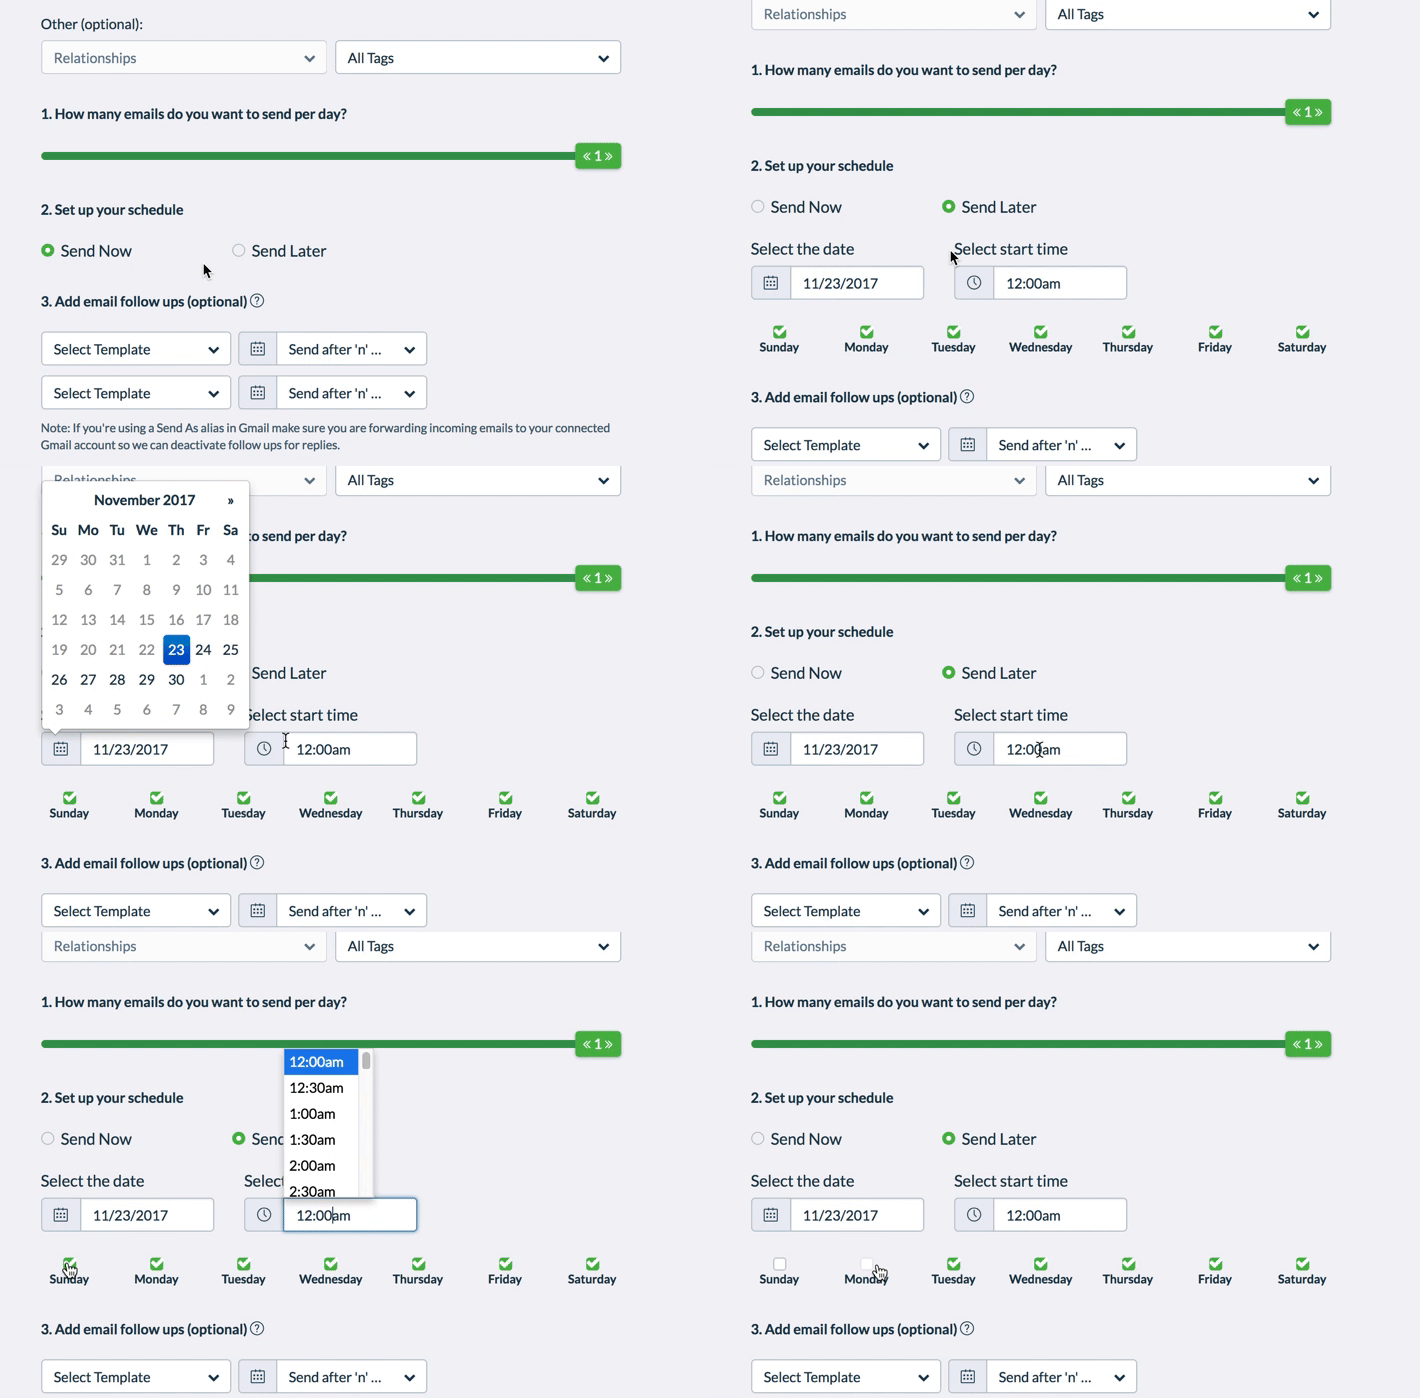
You can send up to a maximum of 200 emails per day, per account.

Step 4: Specify the date and time when the automated email will be active.
You can either choose “Send Now” to send immediately or “Send Later” to schedule for a different date and time.
You can also select the days you want the campaign to be active; by default, all days are selected.
Select from the drop down the time when the Autosending will be active. You can also change this by adjusting the red slider, which sets the limit for the day and will affect how long it takes for the emails to be sent each day.
Step 6: Clear any missing fields required for Autosending
Sometimes, some emails may come up to have missing fields whether it’s a missing first name, contact number, etc.
And if the missing field is required by the template, you’ll be required to fill it up before sending.
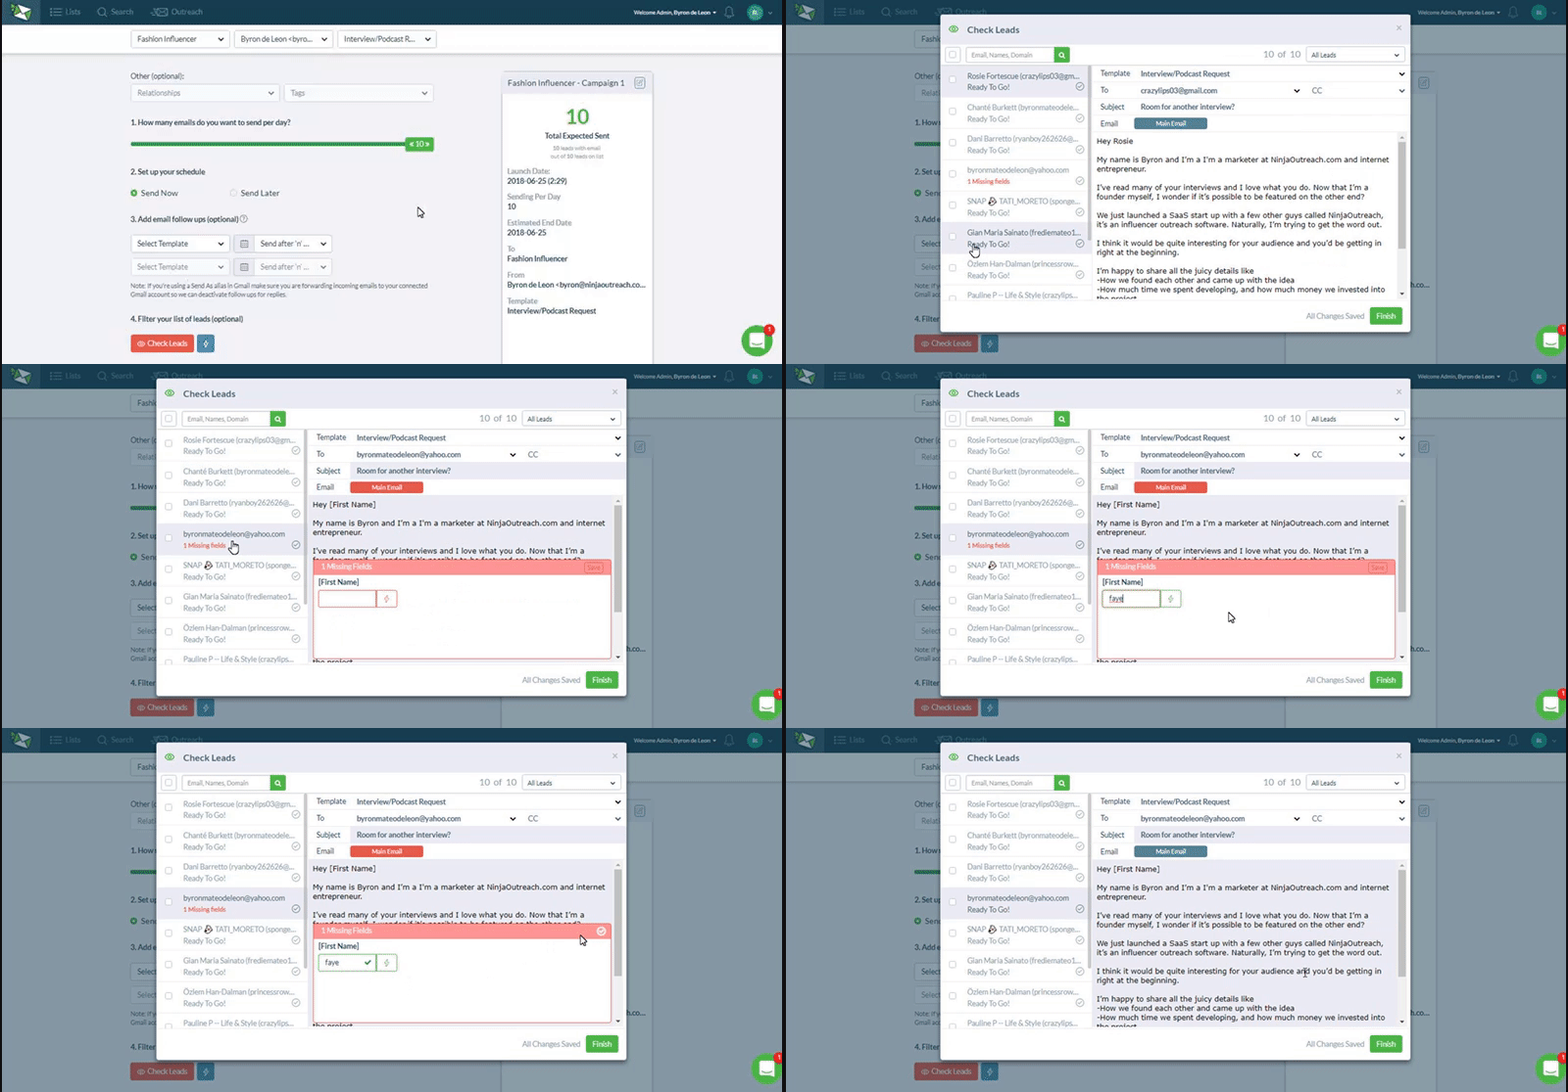
Just scroll to the bottom and you’ll see the “Check Leads” button in Red.
There are 2 ways you can solve a missing field:
1. You can click into “Check Leads” and your missing field should pop up, asking you to fill it up.
Click “Save” and it should fill up your missing field right away!
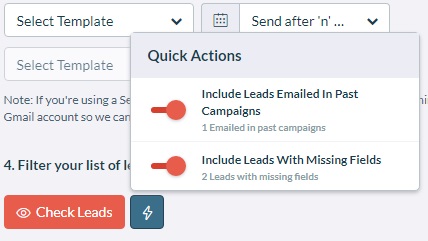
2. Alternatively, you can also quickly exclude them from the campaign through the “Quick Actions” button next to “Check Leads”.
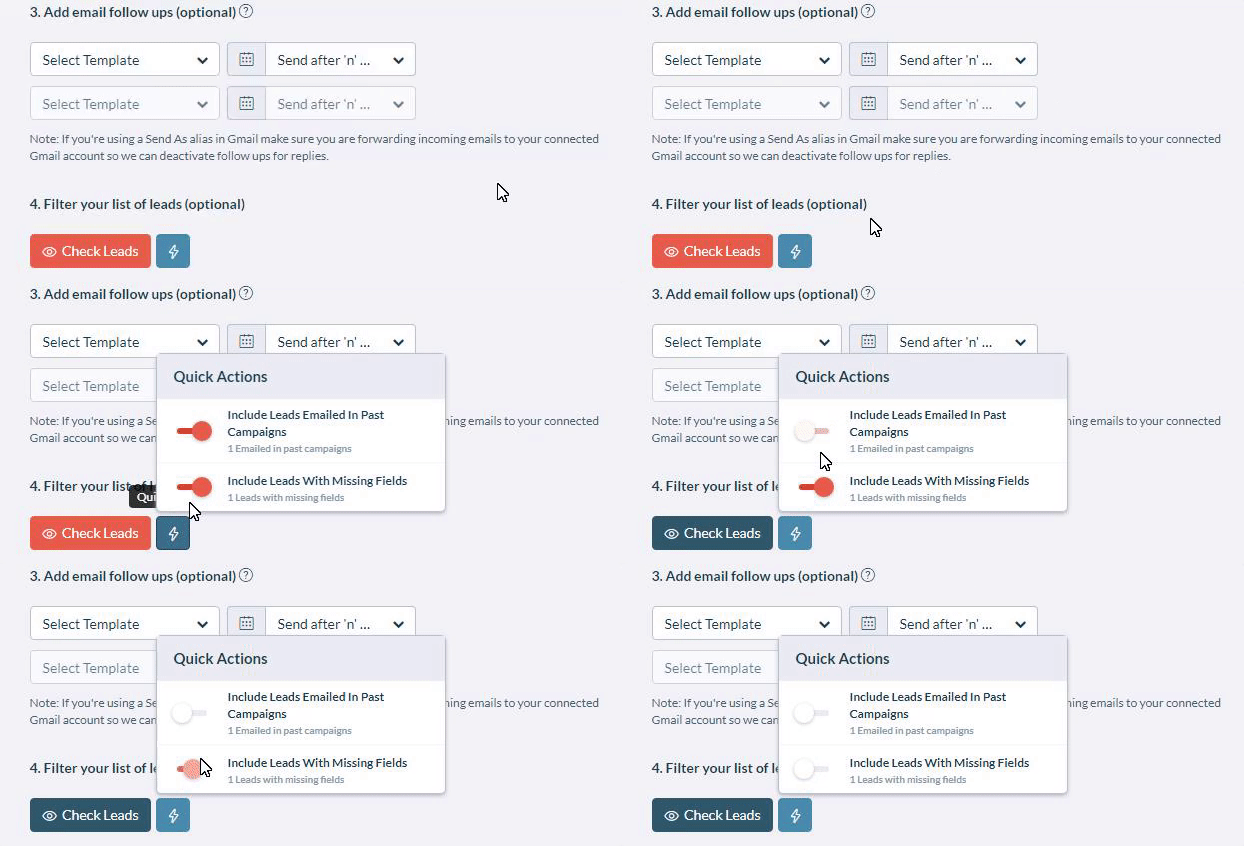
Pro tip: You can use “Quick Actions” to apply that particular missing field to all your filtered lead..
NOTE: This will only apply to leads that have that particular field empty. The ones who are filled will not be changed.
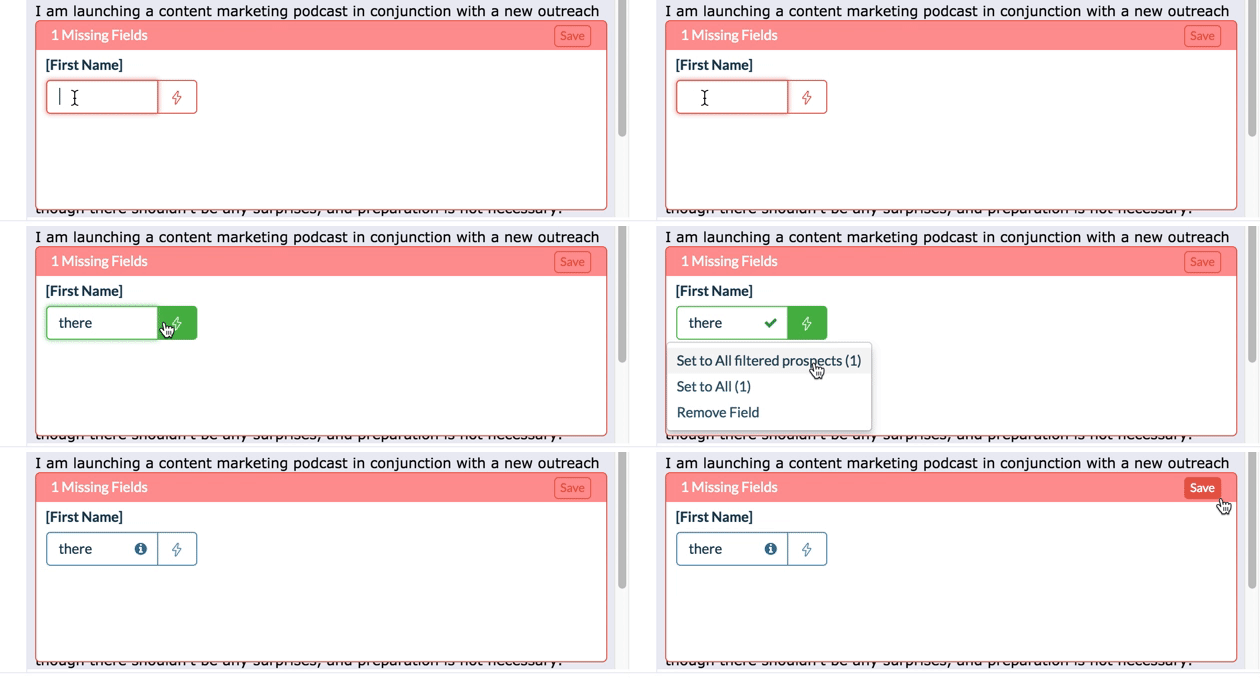
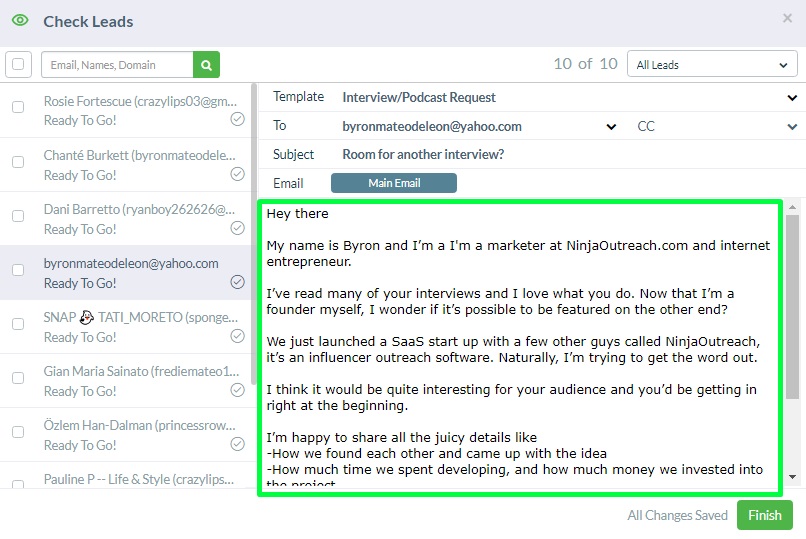
And when you’re done, you should see the changes made on your email body.
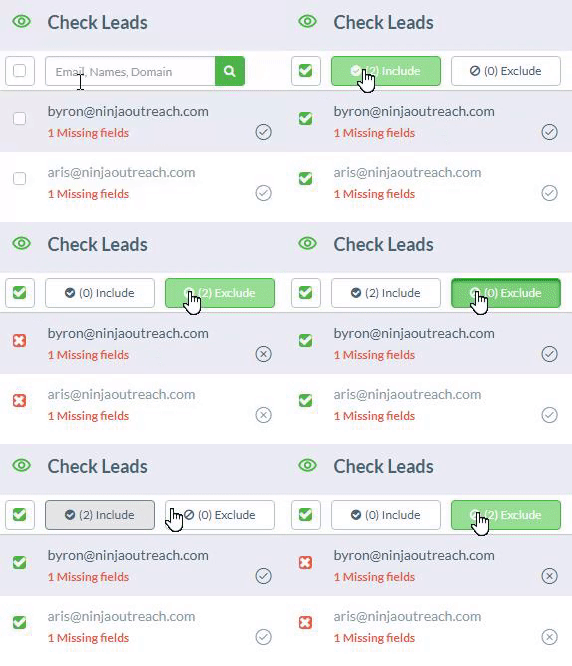
You can also remove leads from getting an email (this will not remove them from the list itself) by clicking the checkbox and deciding to include or remove them from the campaign.
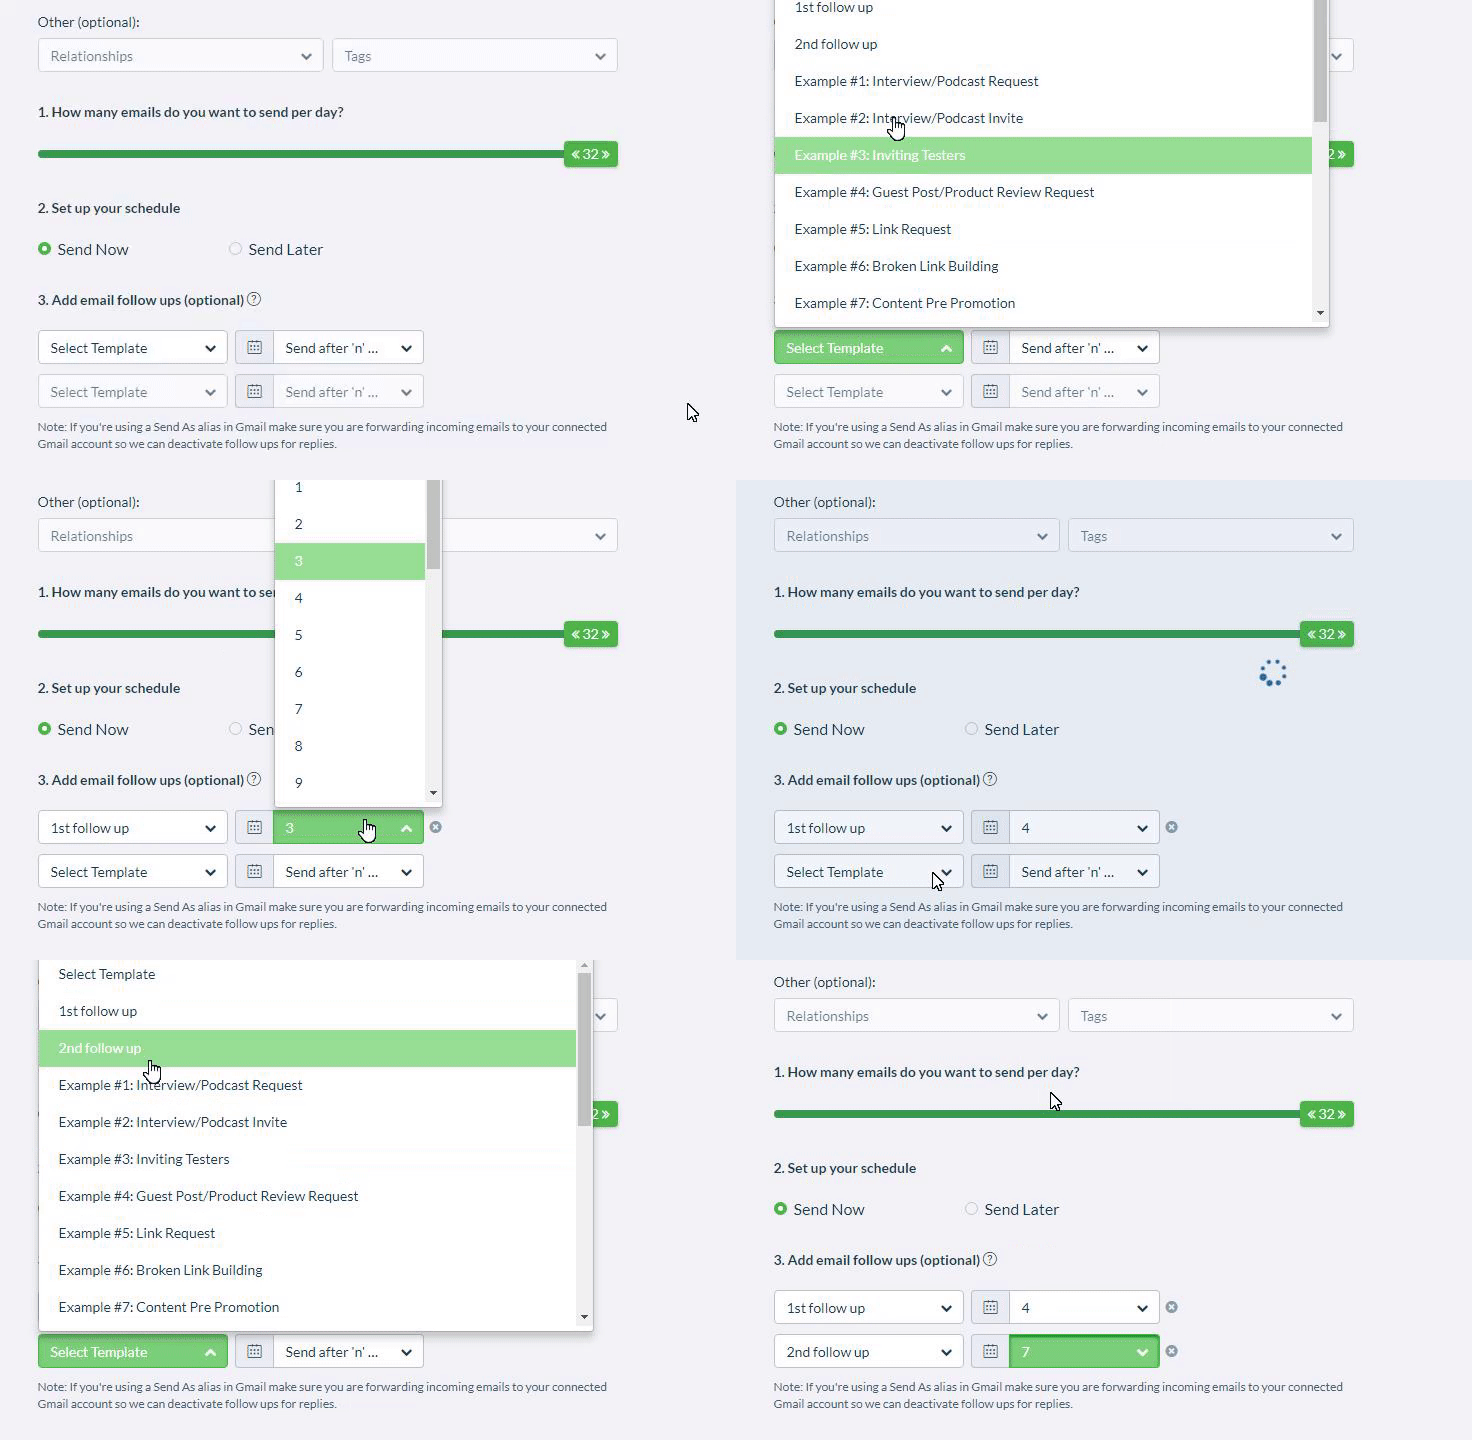
Step 7: Add Follow-ups
You can opt to send up to two follow-up emails after your original email is sent. Click “Select after ‘n’ days” to choose the gap days between each follow-up email.
Important:
- If a lead replies, the follow-up will automatically be disengaged and will not send– you don’t have to do anything!
- You can deactivate your follow-ups (all of them, or for individual users) in the campaign management section. You might need to manually turn off a follow-up if a lead responds from a different email address.
- If you are using a non-Gmail account, make sure that replies are being forwarded to your Gmail account so the software can retrieve them and deactivate follow-ups.
Step 8: Double check that all details are correct
Finally, review the information and see how many leads will be emailed. Clicking launch at the bottom will initiate the campaign.
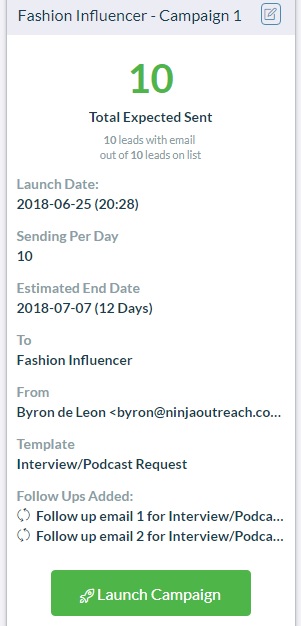
You’ll be able to see the status of each campaign on the dashboard. If you want to cancel one, just click trash can icon to delete campaign and no additional leads will receive emails.
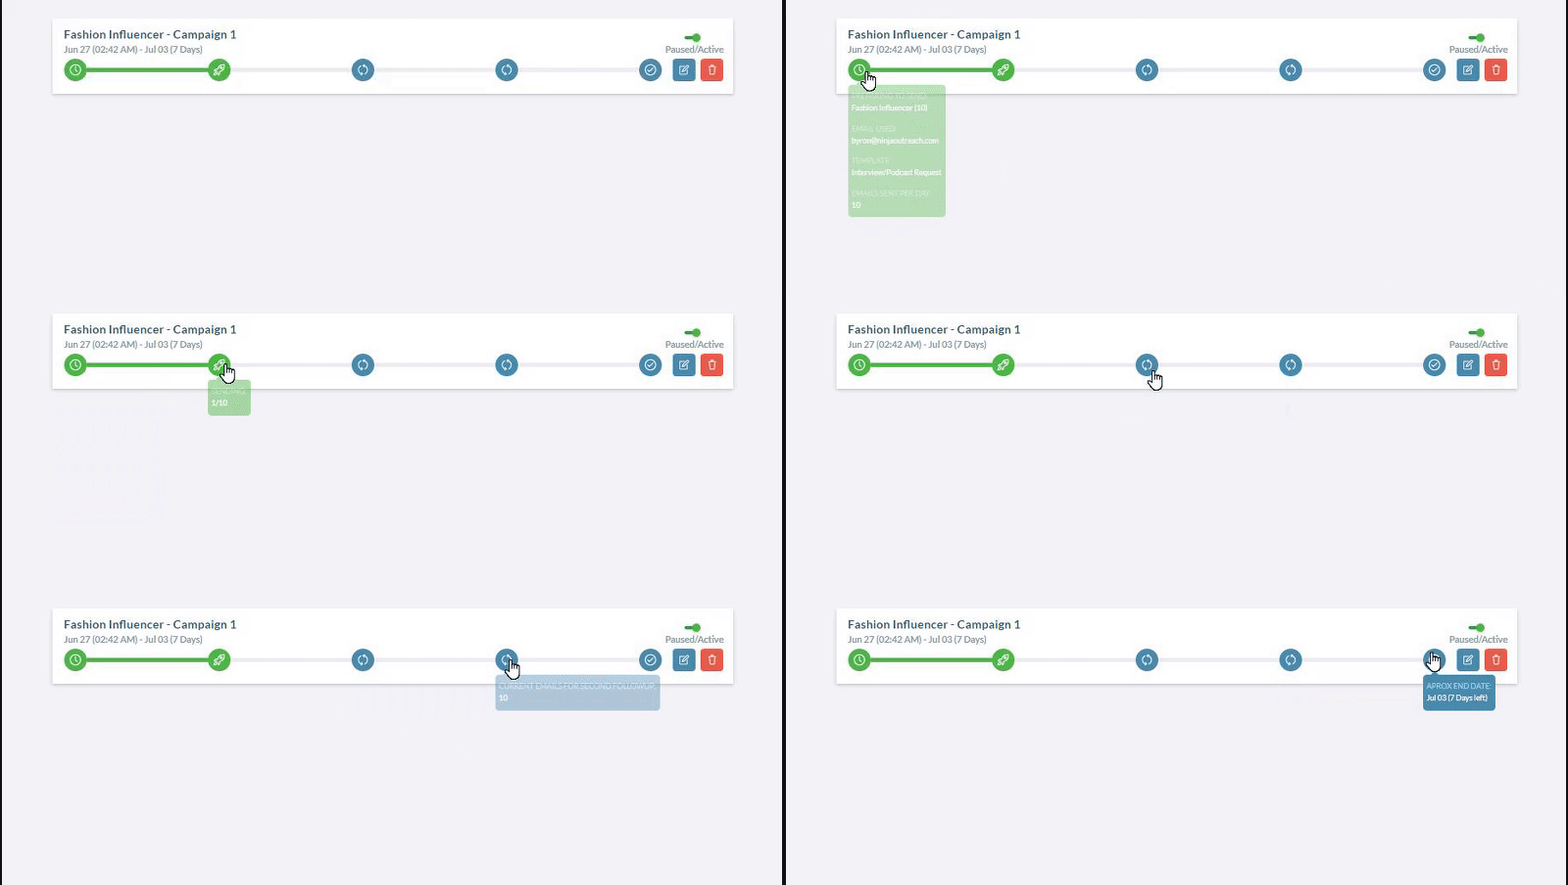
To pause your campaign, simply click the toggle button to switch from “Active” to “Paused”

That’s it! You’ve mastered integrating your email and learnt the trick to simplify your outreach through autosending. Congrats! Now, go make some sales and build some relationships!
P/S: Friendly reminder once again, NinjaOutreach currently has an email limit of 200 sent emails per day. Which means if you have 1000 contacts, the campaign will complete in the span of 5 days.

Leave A Comment?